
Quick Answer: Secure your home WiFi by changing the default admin password, enabling WPA3 encryption, creating a strong network password, disabling WPS, and keeping your router firmware updated. These five steps block the most common attack vectors and can be completed in 20-30 minutes.
Why Your WiFi Network Is a Target
Your home WiFi network is the gateway to every device in your house. Once a hacker gains access, they can intercept your passwords, spy on your web traffic, access your smart home devices, and use your connection for illegal activities that trace back to you.
The good news: most WiFi hacks exploit lazy security defaults that take minutes to fix. This guide walks you through seven essential steps that block 95% of opportunistic attacks. You don’t need to be technical—just follow each step in order.
You’ll learn how to lock down your router’s admin panel, enable military-grade encryption, hide your network from casual scanners, and set up guest access that keeps visitors away from your sensitive devices. By the end, your network will be harder to crack than your neighbor’s, which is usually enough to make attackers move on.
What You’ll Need Before Starting
Gather these items before you begin:
- Your router’s admin username and password (check the sticker on the router’s bottom or side)
- A computer or smartphone connected to your WiFi
- 15-30 minutes of uninterrupted time
- A password manager to generate and store strong passwords (see our Best Password Managers for Remote Teams (2026 Review) guide)
If you’ve lost your router’s admin credentials and never changed them, they’re likely still the factory defaults. Search “[your router brand and model] default password” to find them. If you changed them and forgot, you’ll need to factory reset the router—hold the reset button for 10 seconds with a paperclip.
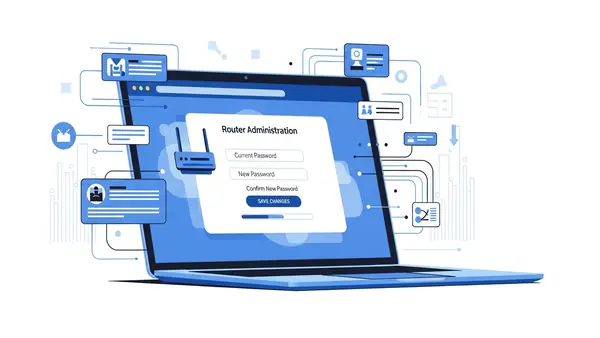
Step 1: Change Your Router’s Admin Password
Your router’s admin password is separate from your WiFi password. It controls access to the router’s settings panel, where all security configurations live. Most routers ship with admin passwords like “admin” or “password”—credentials that hackers try first.
Open a web browser and type your router’s IP address into the address bar. Common addresses are 192.168.1.1, 192.168.0.1, or 10.0.0.1. If those don’t work, open Command Prompt (Windows) or Terminal (Mac) and type ipconfig (Windows) or netstat -nr | grep default (Mac). Look for “Default Gateway.”
Log in with your current admin credentials. Navigate to Administration, Management, or System settings (the exact location varies by router brand). Look for “Change Admin Password” or “Router Password.” Create a strong, unique password of at least 16 characters mixing letters, numbers, and symbols. Store it in your password manager—you’ll need it for future router changes.
Step 2: Enable WPA3 Encryption (Or WPA2 If WPA3 Isn’t Available)
WiFi encryption scrambles the data traveling between your devices and router. Without it, anyone within range can read your traffic. WPA3 is the current gold standard, but many older routers only support WPA2—which is still secure if configured properly.
In your router’s admin panel, find the Wireless, WiFi, or Security section. Look for “Security Mode,” “Authentication,” or “Encryption.” If you see WPA3-Personal (or WPA3-SAE), select it. If not, choose WPA2-Personal with AES encryption. Never select WEP, WPA, or “Open”—these are obsolete and easily cracked.
Some routers offer “WPA2/WPA3 Mixed Mode” to support older devices. This is acceptable for home use, but pure WPA3 is stronger if all your devices support it (most devices from 2019 onward do). Save your changes and note that all connected devices will disconnect—you’ll need to reconnect them with your new settings.
Step 3: Create a Strong WiFi Network Password
Your WiFi password (also called the network key or passphrase) is what you enter on devices to join your network. A weak password here undermines everything else. Hackers use automated tools that try millions of common passwords per second.
Navigate to your router’s Wireless Security settings. Find the field labeled “Password,” “Passphrase,” “Network Key,” or “Pre-Shared Key.” Generate a random password of at least 16 characters using your password manager. Include uppercase, lowercase, numbers, and symbols. Avoid dictionary words, personal information, or patterns like “Password123!”
Write this password down temporarily—you’ll need it to reconnect all your devices. Once everything is reconnected, store it securely in your password manager and destroy the written copy. Yes, a 16-character random string is annoying to type, but you only enter it once per device, and it’s the difference between a network that takes 10 minutes to crack versus 10 million years.
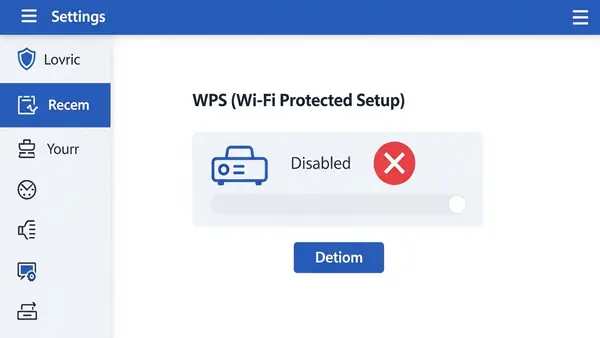
Step 4: Disable WPS (WiFi Protected Setup)
WPS lets devices join your network by pressing a button on the router or entering an 8-digit PIN. It sounds convenient, but the PIN can be cracked in hours using freely available tools. Even if you never use WPS, leaving it enabled creates a backdoor.
In your router settings, look for “WPS,” “WiFi Protected Setup,” or “Push Button Configuration” (often in the Wireless or Advanced section). Disable it completely. Some routers have both a button method and a PIN method—disable both. There’s no legitimate reason to keep WPS enabled on a home network.
If your router has a physical WPS button on the outside, disabling the feature in software usually deactivates the button too. You can verify this by trying to use WPS after disabling it—it should fail.
Step 5: Update Your Router’s Firmware
Router firmware is the software that runs your router. Manufacturers regularly patch security vulnerabilities, but routers don’t auto-update like phones or computers. Running outdated firmware is like leaving a window open for hackers who know exactly which vulnerabilities your router has.
In your router’s admin panel, find “Firmware Update,” “Router Update,” or “System Upgrade” (usually under Administration or Advanced). Check for updates. If one is available, download and install it. This process takes 5-10 minutes and will reboot your router—your internet will be down briefly.
Enable automatic updates if your router supports them. If not, set a calendar reminder to check manually every 3 months. Some newer routers from brands like Asus, Netgear, and TP-Link now include auto-update features—enable them.
Step 6: Change Your Network Name (SSID)
Your network name (SSID) shouldn’t reveal your router model or personal information. Default names like “NETGEAR37” or “Linksys-5G” tell hackers exactly what hardware you’re running, making targeted attacks easier. Names like “Smith Family WiFi” reveal who lives there.
Find the “Wireless Settings” or “SSID” section in your router admin panel. Change the network name to something generic and non-identifying. “Home Network 5G” or “Apartment 4B” work fine. Avoid inside jokes, addresses, or anything that identifies you or your equipment.
While you’re here, disable “SSID Broadcast” if you want your network hidden from casual WiFi scans. This adds a minor layer of security—your network won’t appear in the list when neighbors search for WiFi. However, determined attackers can still detect hidden networks, so don’t rely on this as primary protection. For most home users, keeping the SSID visible but generic is fine.
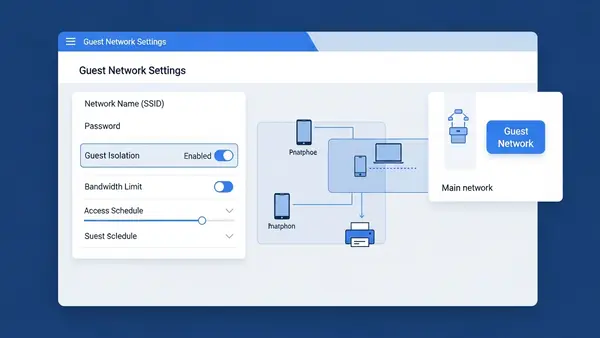
Step 7: Set Up a Guest Network
Guest networks create a separate WiFi connection for visitors and IoT devices. This isolates them from your main network where your computers, phones, and sensitive data live. If a guest’s infected laptop or your smart lightbulb gets compromised, the attacker can’t pivot to your primary devices.
Look for “Guest Network,” “Guest Access,” or “Multiple SSIDs” in your router settings. Enable the guest network and give it a different name (like “Guest WiFi”). Set a separate password—it can be simpler than your main network password since you’ll share it with visitors. Enable “Client Isolation” or “AP Isolation” if available—this prevents guest devices from seeing each other.
Connect all your smart home devices (security cameras, smart speakers, smart TVs) to the guest network instead of your main network. These devices often have poor security and rarely receive updates. Keeping them isolated limits the damage if one gets hacked. Your main network should only include trusted computers, phones, and tablets.
Common Mistakes That Undermine WiFi Security
Using the same password for WiFi and router admin: If someone cracks your WiFi password (maybe you gave it to a visitor who wrote it down), they shouldn’t automatically have access to change your router settings. Always use different passwords for these two functions.
Forgetting to reconnect devices after security changes: When you change your WiFi password or encryption type, every device disconnects. You must manually reconnect each one with the new password. If you skip a device, it won’t have network access—and you might not notice until you need it.
Disabling the firewall to “fix” connection issues: Your router’s built-in firewall blocks unsolicited incoming connections. Some users disable it when troubleshooting, then forget to re-enable it. Never leave your firewall disabled. If you’re having connection problems, there’s always a better solution than removing your primary defense.
Enabling remote management without understanding the risks: Remote management lets you access your router’s admin panel from outside your home network. Unless you specifically need this (and know how to secure it with VPN access), keep it disabled. It’s a common attack vector.
Ignoring connected device lists: Your router shows all devices currently connected to your network. Review this list monthly. If you see unknown devices, change your WiFi password immediately—someone unauthorized has access.
How to Verify Your Security Changes Worked
After completing all seven steps, verify your security improvements. First, try connecting a device using your old WiFi password—it should fail. Try accessing your router admin panel with the old admin password—it should also fail. These failures confirm your password changes took effect.
Check your router’s security settings one more time. Confirm WPA2 or WPA3 is enabled, WPS is disabled, and firmware is current. Look at the connected devices list—you should recognize every device. If you enabled guest network isolation, try accessing your main computer from a device on the guest network—it should be blocked.
For advanced verification, you can use free tools like WiFi Analyzer (Android) or NetSpot (Mac/Windows) to scan your network and confirm encryption type. These apps show your network’s security protocol from an outside perspective, verifying what attackers would see.
Next Steps: Additional WiFi Security Improvements
Once you’ve completed the essential seven steps, consider these advanced protections:
Enable MAC address filtering: Every device has a unique MAC address. Your router can whitelist only approved devices, blocking everything else. This adds friction (you must manually approve new devices), but it’s valuable for high-security needs.
Disable unused services: Many routers run services like UPnP, Telnet, or SSH that most home users never need. Each enabled service is a potential attack surface. In your router’s advanced settings, disable any service you don’t actively use.
Set up a VPN at the router level: Instead of running VPN software on each device, configure your router to route all traffic through a VPN. This protects every device automatically, including smart home gadgets that can’t run VPN apps. This requires a VPN-capable router and a VPN subscription.
Replace your ISP’s router: Internet service providers often supply low-quality routers with limited security features and slow update cycles. Buying your own router (from brands like Asus, Netgear, or Ubiquiti) gives you better security controls and performance. Budget $100-200 for a quality home router.
Implement network monitoring: Tools like Firewalla or Fingbox sit on your network and alert you to suspicious activity, new devices, or known malicious connections. These are overkill for most homes but valuable if you work from home or handle sensitive data.
For additional security layers beyond your network, review our guides on Stop Browsing as Administrator: The #1 Security Mistake Windows Users Make and SMS vs MFA: Why I Stopped Using Text Messages for 2FA in (2026) to protect your devices even if your WiFi is compromised.
Frequently Asked Questions
How often should I change my WiFi password?
Change your WiFi password every 6-12 months, or immediately if you suspect unauthorized access or after giving it to someone you no longer trust. Unlike account passwords that face constant automated attacks, WiFi passwords are primarily at risk from people who’ve had physical proximity to your network. A strong, random password rarely needs changing unless potentially compromised.
Will these security changes slow down my internet speed?
No, enabling WPA3 or WPA2 encryption has negligible performance impact on modern routers and devices. The encryption happens at hardware speed. You might notice a brief interruption when applying settings, but your day-to-day speeds will remain the same. In fact, removing unauthorized users from your network often improves speed by reducing congestion.
What if my smart home devices won’t connect after enabling WPA3?
Many older smart home devices only support WPA2. If devices fail to connect after enabling WPA3, switch to “WPA2/WPA3 Mixed Mode” in your router settings. This allows both protocols simultaneously. Alternatively, connect legacy devices to your guest network running WPA2, keeping your main network on pure WPA3 for maximum security.
Can I hide my WiFi network completely to make it invisible to hackers?
Disabling SSID broadcast hides your network from casual WiFi lists, but it doesn’t make you invisible to determined attackers. Hackers use tools that detect hidden networks easily. SSID hiding adds minor inconvenience for attackers and major inconvenience for you (connecting new devices is harder). Focus on strong encryption and passwords instead—hiding your network is security theater.
Do I need to secure my 5GHz and 2.4GHz bands separately?
Most modern routers let you configure both bands together with the same security settings, but some require separate configuration. Check both in your router settings. Apply the same security measures (WPA3/WPA2, strong password, WPS disabled) to both bands. If your router offers separate names for each band, that’s fine—just ensure both have identical security settings.
Tye is a CISSP-certified cybersecurity analyst with over 25 years in IT and 15 years specializing in network defense and threat intelligence. He built PacketMoat to bring enterprise-grade security knowledge to everyday people and small businesses.