Category: How-To Guides

Step-by-step cybersecurity tutorials and walkthroughs

  • How to Implement Zero Trust Security for Small Business: A Step-by-Step Guide (2026)

    How to Implement Zero Trust Security for Small Business: A Step-by-Step Guide (2026)

    Quick Answer: Implementing zero trust security for small business starts with identity verification (hardware security keys like YubiKey 5 NFC), network segmentation (next-gen firewalls), and enforcing least-privilege access. Most SMBs can deploy a basic zero trust framework in 60-90 days for $5,000-$15,000, with immediate ROI through reduced breach risk and insurance premiums.

    This article contains affiliate links. PacketMoat may earn a commission at no extra cost to you when you purchase through these links. This helps support our cybersecurity research and content creation.

    Executive Summary: The Business Risk of Trusting Your Network

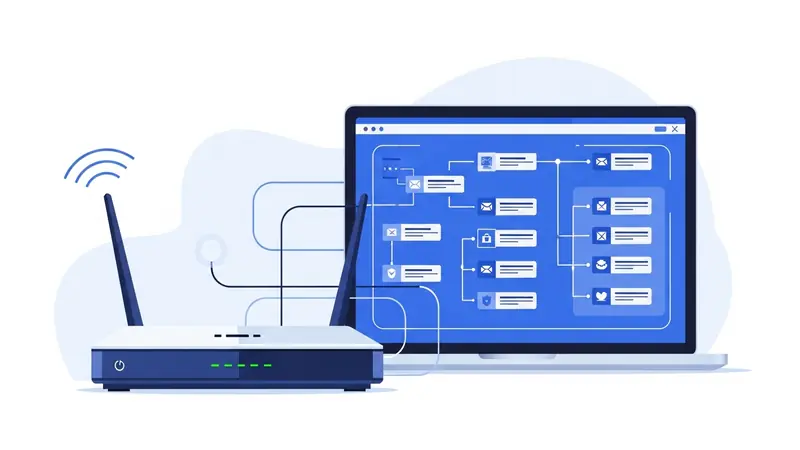
    Traditional perimeter security assumes everything inside your network is safe. That assumption is killing small businesses. When an attacker breaches your firewall—through a phished employee, compromised vendor, or unpatched vulnerability—they have free rein to move laterally across your entire network.

    Zero trust security operates on a simple principle: trust nothing, verify everything. Every user, device, and application must prove its identity before accessing resources, regardless of network location. For SMBs, this isn’t paranoia—it’s survival. The average cost of a data breach for small businesses now exceeds $120,000, and 60% of breached SMBs close within six months.

    Why SMBs Are Prime Targets for Network-Based Attacks

    Cybercriminals target small businesses because they have valuable data (customer records, financial information, intellectual property) but typically lack enterprise-grade security. The 2023 Verizon Data Breach Investigations Report found that 43% of cyberattacks target small businesses, yet only 14% are adequately prepared to defend themselves.

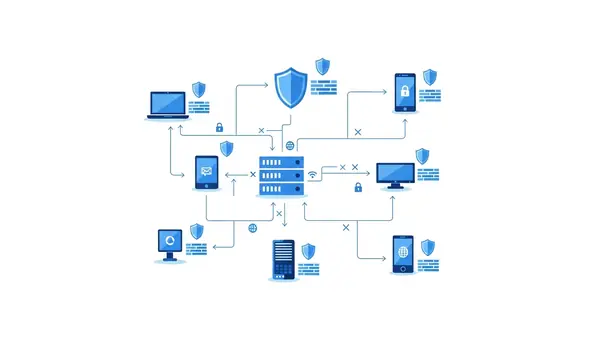
    The attack pattern is predictable: compromise one employee account through phishing, use those credentials to access the network, then move laterally to find high-value targets. Traditional perimeter security can’t stop this—once the attacker is inside, they’re trusted by default. The 2022 LastPass breach demonstrated this perfectly: attackers compromised a single DevOps engineer’s home computer, then used that access to eventually reach the company’s production environment.

    For SMBs, the risk is amplified by remote work. Your network perimeter now extends to every employee’s home office, coffee shop, and hotel room. Without zero trust controls, each remote connection is a potential entry point.

    Step 1: Implement Strong Identity Verification

    Zero trust starts with identity. You cannot verify access without first proving who (or what) is requesting it. This means moving beyond passwords to multi-factor authentication (MFA) using hardware security keys.

    Deploy YubiKey 5 NFC devices to every employee. Unlike SMS-based MFA (which can be intercepted), hardware keys provide phishing-resistant authentication. The YubiKey 5 NFC works with virtually every business application—Microsoft 365, Google Workspace, password managers, VPNs—and costs under $50 per employee. For USB-C devices, consider the YubiKey 5C NFC.

    Configure your identity provider (Azure AD, Okta, Google Workspace) to require hardware key authentication for all users. Set conditional access policies that block login attempts from unrecognized devices or suspicious locations. This single step eliminates 99.9% of automated credential stuffing attacks.

    For detailed deployment guidance, see our Phishing-Proof Your Remote Team: Why the YubiKey 5 NFC is Mandatory for SMB Security (2026 ROI Guide) which includes ROI calculations and implementation timelines.

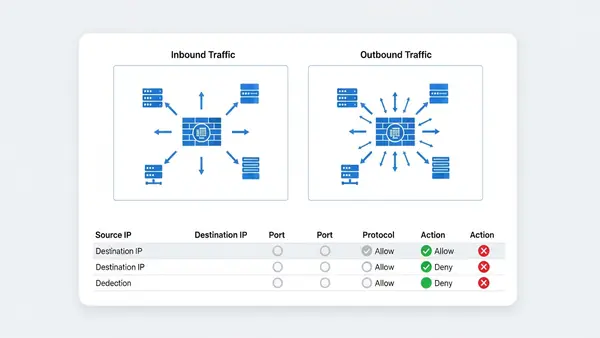
    Step 2: Deploy Network Segmentation and Microsegmentation

    Traditional networks are flat—once you’re in, you can access everything. Zero trust requires segmentation: dividing your network into isolated zones with strict access controls between them.

    Start with a next-generation firewall that supports application-level inspection and identity-based policies. For SMBs with 25-100 employees, the Firewalla Gold Plus offers an excellent balance of capability and affordability. It provides VLAN segmentation, intrusion detection, and granular access controls without requiring a dedicated security team.

    For businesses with more complex requirements or multiple office locations, the Ubiquiti Dream Machine Pro delivers enterprise-grade features at SMB pricing. It includes built-in controller software for managing multiple sites and supports advanced segmentation policies.

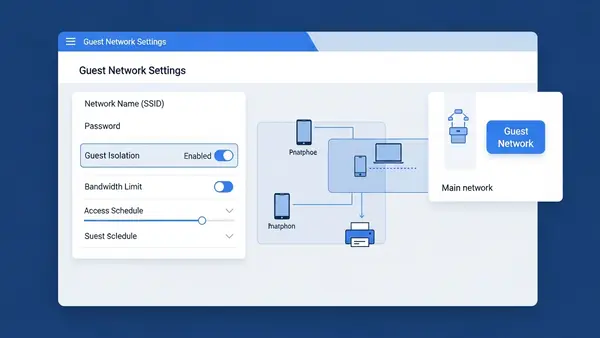
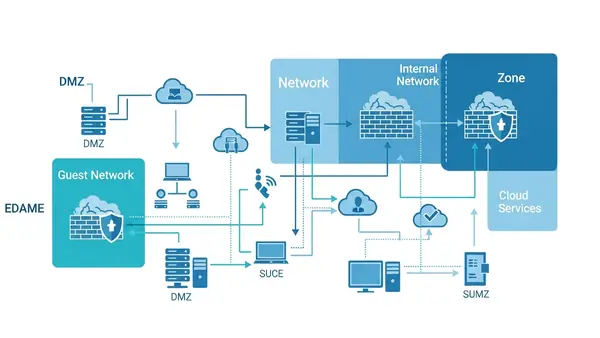
    Create separate network segments for: employee workstations, guest WiFi, IoT devices (printers, security cameras), servers, and any industrial/operational technology. Configure firewall rules so that each segment can only access the specific resources it needs. Your reception area printer doesn’t need access to your accounting server.

    network diagram showing segmented business network with firewall separating different zones

    Step 3: Enforce Least-Privilege Access Controls

    Zero trust requires that users and devices receive the minimum access necessary to perform their functions—nothing more. This limits the damage from compromised accounts.

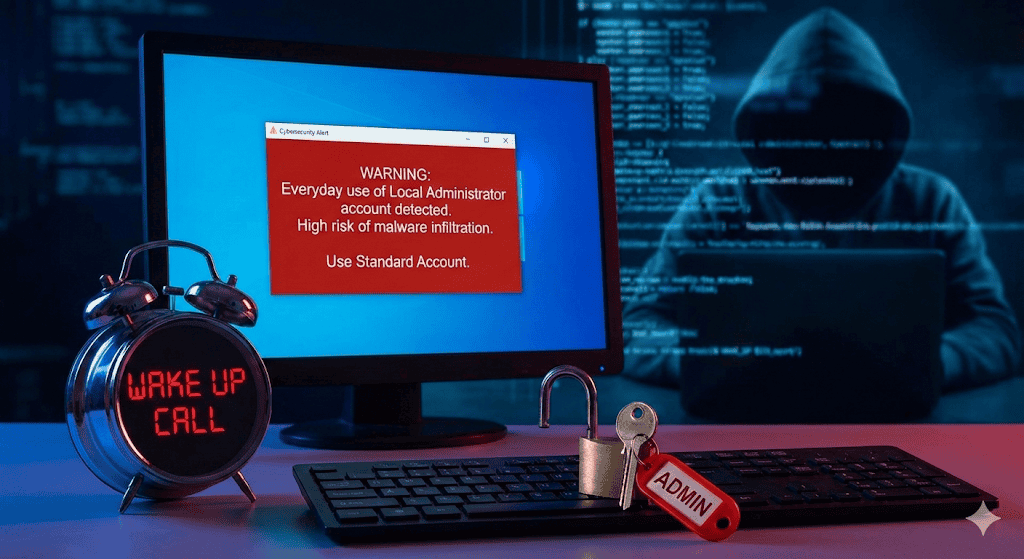
    Audit your current access controls. How many employees have admin rights they don’t need? How many service accounts have overly broad permissions? Start by removing local administrator privileges from user workstations. Our guide on Stop Browsing as Administrator: The #1 Security Mistake Windows Users Make explains why this is critical and how to implement it without disrupting productivity.

    Implement role-based access control (RBAC) in your core business systems. Define roles based on job functions (sales, accounting, IT, management) and assign permissions to roles rather than individuals. When someone changes positions, you update their role assignment rather than manually adjusting dozens of permissions.

    Use a privileged access management (PAM) solution for administrative accounts. These systems require additional authentication before granting elevated privileges and log all administrative actions. For SMBs, cloud-based PAM solutions like CyberArk Endpoint Privilege Manager or BeyondTrust start around $10-15 per user per month.

    Step 4: Secure Remote Access with Zero Trust Network Access

    Traditional VPNs grant full network access once connected—the opposite of zero trust. Zero Trust Network Access (ZTNA) solutions verify identity and device posture before granting access to specific applications, not the entire network.

    For SMBs, cloud-based ZTNA solutions offer the easiest deployment path. Services like Cloudflare Access, Twingate, or Perimeter 81 sit between your users and applications, enforcing identity verification and access policies without requiring complex on-premises infrastructure. Pricing typically ranges from $5-12 per user per month.

    Configure your ZTNA solution to check device health before granting access. Is the device running up-to-date antivirus? Is the operating system patched? Is the hard drive encrypted? Devices that fail these checks should be denied access or restricted to a quarantine network until remediated.

    Combine ZTNA with a centralized password management solution like those covered in our Best Password Managers for Remote Teams (2026 Review) guide. This ensures remote employees use unique, strong passwords for every application while maintaining zero trust principles.

    Step 5: Implement Continuous Monitoring and Verification

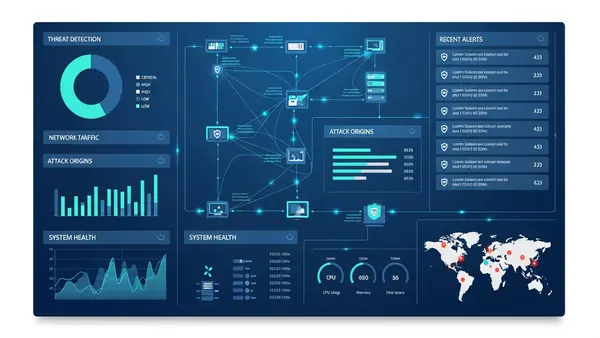
    Zero trust isn’t “verify once and trust forever”—it’s continuous verification. You need visibility into what’s happening across your network in real-time.

    Deploy endpoint detection and response (EDR) software on all devices. Solutions like SentinelOne, CrowdStrike Falcon, or Microsoft Defender for Endpoint monitor for suspicious behavior and can automatically isolate compromised devices. For SMBs, expect to pay $5-15 per endpoint per month.

    Implement centralized logging and security information and event management (SIEM). At minimum, collect and retain logs from your firewall, identity provider, servers, and critical applications. Cloud-based SIEM solutions like Devo, Exabeam, or Microsoft Sentinel offer SMB-friendly pricing starting around $1-2 per GB of log data per month.

    Set up alerts for suspicious activities: failed login attempts from unusual locations, access to sensitive data outside business hours, lateral movement between network segments, or devices communicating with known malicious IP addresses. Respond to alerts within hours, not days.

    security operations center dashboard showing real-time network monitoring and threat detection

    Step 6: Protect Data at Rest and in Transit

    Zero trust extends to data itself. Encrypt sensitive information both when stored (at rest) and when transmitted (in transit).

    For data in transit, enforce TLS 1.3 for all web traffic and require VPN or ZTNA connections for remote access. Disable legacy protocols like SMBv1, FTP, and Telnet that transmit data in cleartext.

    For data at rest, enable full-disk encryption on all devices using BitLocker (Windows), FileVault (macOS), or LUKS (Linux). For highly sensitive data that leaves your premises, use encrypted USB drives like the Apricorn Aegis Secure Key 3NXC which features hardware encryption and PIN protection.

    Implement data loss prevention (DLP) policies that prevent sensitive information from being emailed to external addresses, uploaded to unauthorized cloud services, or copied to unencrypted removable media. Cloud-based DLP solutions integrate with Microsoft 365 and Google Workspace starting around $3-5 per user per month.

    Budget Considerations and ROI Analysis

    Implementing zero trust doesn’t require an enterprise budget. A typical 25-person small business can deploy a comprehensive zero trust framework for $10,000-$15,000 in first-year costs, breaking down approximately as:

    • Hardware security keys: $1,250 (25 users × $50)
    • Next-generation firewall: $2,000-$4,000 (hardware + first-year licensing)
    • ZTNA solution: $1,800-$3,600 annually ($6-12 per user per month)
    • EDR software: $1,500-$4,500 annually ($5-15 per endpoint per month)
    • PAM solution: $3,000-$4,500 annually ($10-15 per user per month)
    • Cloud SIEM: $1,200-$2,400 annually (depends on log volume)
    • Implementation consulting: $2,000-$5,000 (optional but recommended)

    Ongoing annual costs (years 2+) drop to $7,500-$15,000 as you’re only paying software subscriptions and firewall renewals. Compare this to the average SMB data breach cost of $120,000-$200,000, and the ROI is immediate.

    Many businesses see additional cost savings through reduced cyber insurance premiums (15-30% discounts for implementing zero trust controls), decreased IT support time (fewer malware incidents), and improved employee productivity (secure remote access enables flexible work arrangements).

    Compliance Implications: NIST, SOC 2, and Industry Frameworks

    Zero trust architecture aligns with multiple compliance frameworks, making it easier to meet regulatory requirements.

    The NIST Cybersecurity Framework explicitly recommends zero trust principles in its “Protect” and “Detect” functions. Implementing the steps above addresses NIST controls PR.AC-4 (access permissions management), PR.AC-7 (authentication and authorization), and DE.CM-7 (monitoring for unauthorized activity).

    For businesses pursuing SOC 2 certification, zero trust directly supports the Security principle’s common criteria around access controls (CC6.1-CC6.3), logical and physical access (CC6.6-CC6.7), and system monitoring (CC7.2). Many auditors now expect to see zero trust controls in place.

    Industry-specific frameworks also mandate zero trust principles. HIPAA requires access controls and audit trails for protected health information. PCI DSS 4.0 (effective March 2025) explicitly requires multi-factor authentication and network segmentation. CMMC 2.0 for defense contractors includes zero trust as a key security practice at Level 2 and above.

    Document your zero trust implementation thoroughly. Maintain network diagrams, access control matrices, and evidence of continuous monitoring. These artifacts streamline compliance audits and demonstrate due diligence in the event of a breach.

    Quick-Start Checklist: Your First 90 Days

    Implementing zero trust is a journey, not a destination. Use this timeline to build momentum:

    Days 1-30: Foundation

    • Audit current access controls and identify overly permissive accounts
    • Purchase and deploy hardware security keys to all employees
    • Enable MFA on all business-critical applications (email, accounting, CRM)
    • Remove local administrator privileges from user workstations
    • Document your current network architecture and data flows

    Days 31-60: Network Security

    • Deploy next-generation firewall with segmentation capabilities
    • Create separate network segments for workstations, servers, guests, and IoT
    • Implement ZTNA solution for remote access
    • Configure conditional access policies in your identity provider
    • Enable full-disk encryption on all devices

    Days 61-90: Monitoring and Refinement

    • Deploy EDR software on all endpoints
    • Implement centralized logging and SIEM
    • Configure alerts for suspicious activities
    • Conduct tabletop exercise to test incident response
    • Review and refine access policies based on actual usage patterns

    After 90 days, shift to continuous improvement: quarterly access reviews, monthly security awareness training, and ongoing monitoring of emerging threats.

    business professional reviewing security checklist on tablet with network infrastructure in background

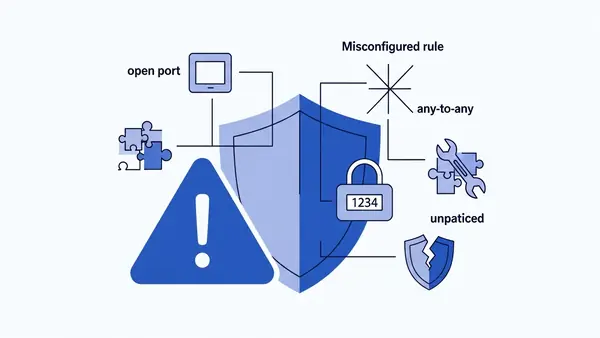
    Common Implementation Pitfalls to Avoid

    Many SMBs stumble during zero trust implementation. Avoid these mistakes:

    Over-restricting access upfront. Start with monitoring mode to understand normal access patterns before enforcing strict policies. Blocking legitimate business activities destroys user trust and leads to shadow IT workarounds.

    Neglecting user training. Zero trust introduces friction—additional authentication steps, access requests, device health checks. Explain why these measures exist and how they protect both the business and employees’ personal information. Users who understand the “why” are more likely to comply.

    Ignoring legacy systems. That 15-year-old accounting server that can’t support modern authentication? It’s your biggest risk. Either upgrade it, replace it, or isolate it on a heavily restricted network segment with enhanced monitoring.

    Treating zero trust as a one-time project. Threats evolve, your business changes, and employees come and go. Schedule quarterly access reviews, update policies as needed, and continuously monitor for anomalies.

    Frequently Asked Questions

    How much does zero trust security cost for a 25-person small business?

    Expect $10,000-$15,000 in first-year costs including hardware, software subscriptions, and implementation. Ongoing annual costs drop to $7,500-$15,000 for software renewals and licensing. This is significantly less than the average SMB data breach cost of $120,000-$200,000, providing immediate ROI.

    Do I need zero trust security to comply with SOC 2 or HIPAA?

    While neither framework explicitly mandates “zero trust” by name, both require the security controls that zero trust provides: multi-factor authentication, least-privilege access, network segmentation, and continuous monitoring. Implementing zero trust architecture addresses multiple compliance requirements simultaneously and simplifies audit preparation.

    Can I implement zero trust with my current IT staff, or do I need outside help?

    Most SMBs can implement basic zero trust controls with existing IT staff, especially using cloud-based solutions that minimize infrastructure complexity. Budget 10-15 hours per week for 90 days for the initial deployment. Consider hiring a consultant for the network segmentation and SIEM configuration phases, which are the most technically complex. Expect to pay $2,000-$5,000 for consulting support.

    How does zero trust affect employee productivity and user experience?

    Initially, zero trust introduces friction through additional authentication steps and access requests. However, modern implementations use single sign-on and adaptive authentication to minimize disruption. Most employees adapt within 2-3 weeks. The productivity gains from reduced malware incidents, faster secure remote access, and decreased IT support tickets typically offset any initial slowdown.

    What’s the biggest mistake small businesses make when implementing zero trust?

    The biggest mistake is trying to implement everything at once and over-restricting access without understanding normal business workflows. This leads to user frustration, shadow IT workarounds, and abandoned security projects. Start with identity verification and basic network segmentation, then gradually add controls while monitoring impact. Zero trust is a journey that takes 6-12 months, not a one-month sprint.

  • How to Secure Your Home WiFi Network from Hackers: 7 Essential Steps (2026 Guide)

    How to Secure Your Home WiFi Network from Hackers: 7 Essential Steps (2026 Guide)

    Quick Answer: Secure your home WiFi by changing the default admin password, enabling WPA3 encryption, creating a strong network password, disabling WPS, and keeping your router firmware updated. These five steps block the most common attack vectors and can be completed in 20-30 minutes.

    Why Your WiFi Network Is a Target

    Your home WiFi network is the gateway to every device in your house. Once a hacker gains access, they can intercept your passwords, spy on your web traffic, access your smart home devices, and use your connection for illegal activities that trace back to you.

    The good news: most WiFi hacks exploit lazy security defaults that take minutes to fix. This guide walks you through seven essential steps that block 95% of opportunistic attacks. You don’t need to be technical—just follow each step in order.

    You’ll learn how to lock down your router’s admin panel, enable military-grade encryption, hide your network from casual scanners, and set up guest access that keeps visitors away from your sensitive devices. By the end, your network will be harder to crack than your neighbor’s, which is usually enough to make attackers move on.

    What You’ll Need Before Starting

    Gather these items before you begin:

    • Your router’s admin username and password (check the sticker on the router’s bottom or side)
    • A computer or smartphone connected to your WiFi
    • 15-30 minutes of uninterrupted time
    • A password manager to generate and store strong passwords (see our Best Password Managers for Remote Teams (2026 Review) guide)

    If you’ve lost your router’s admin credentials and never changed them, they’re likely still the factory defaults. Search “[your router brand and model] default password” to find them. If you changed them and forgot, you’ll need to factory reset the router—hold the reset button for 10 seconds with a paperclip.

    Step 1: Change Your Router’s Admin Password

    Your router’s admin password is separate from your WiFi password. It controls access to the router’s settings panel, where all security configurations live. Most routers ship with admin passwords like “admin” or “password”—credentials that hackers try first.

    Open a web browser and type your router’s IP address into the address bar. Common addresses are 192.168.1.1, 192.168.0.1, or 10.0.0.1. If those don’t work, open Command Prompt (Windows) or Terminal (Mac) and type ipconfig (Windows) or netstat -nr | grep default (Mac). Look for “Default Gateway.”

    Log in with your current admin credentials. Navigate to Administration, Management, or System settings (the exact location varies by router brand). Look for “Change Admin Password” or “Router Password.” Create a strong, unique password of at least 16 characters mixing letters, numbers, and symbols. Store it in your password manager—you’ll need it for future router changes.

    router admin login page showing password change interface on laptop screen

    Step 2: Enable WPA3 Encryption (Or WPA2 If WPA3 Isn’t Available)

    WiFi encryption scrambles the data traveling between your devices and router. Without it, anyone within range can read your traffic. WPA3 is the current gold standard, but many older routers only support WPA2—which is still secure if configured properly.

    In your router’s admin panel, find the Wireless, WiFi, or Security section. Look for “Security Mode,” “Authentication,” or “Encryption.” If you see WPA3-Personal (or WPA3-SAE), select it. If not, choose WPA2-Personal with AES encryption. Never select WEP, WPA, or “Open”—these are obsolete and easily cracked.

    Some routers offer “WPA2/WPA3 Mixed Mode” to support older devices. This is acceptable for home use, but pure WPA3 is stronger if all your devices support it (most devices from 2019 onward do). Save your changes and note that all connected devices will disconnect—you’ll need to reconnect them with your new settings.

    Step 3: Create a Strong WiFi Network Password

    Your WiFi password (also called the network key or passphrase) is what you enter on devices to join your network. A weak password here undermines everything else. Hackers use automated tools that try millions of common passwords per second.

    Navigate to your router’s Wireless Security settings. Find the field labeled “Password,” “Passphrase,” “Network Key,” or “Pre-Shared Key.” Generate a random password of at least 16 characters using your password manager. Include uppercase, lowercase, numbers, and symbols. Avoid dictionary words, personal information, or patterns like “Password123!”

    Write this password down temporarily—you’ll need it to reconnect all your devices. Once everything is reconnected, store it securely in your password manager and destroy the written copy. Yes, a 16-character random string is annoying to type, but you only enter it once per device, and it’s the difference between a network that takes 10 minutes to crack versus 10 million years.

    Step 4: Disable WPS (WiFi Protected Setup)

    WPS lets devices join your network by pressing a button on the router or entering an 8-digit PIN. It sounds convenient, but the PIN can be cracked in hours using freely available tools. Even if you never use WPS, leaving it enabled creates a backdoor.

    In your router settings, look for “WPS,” “WiFi Protected Setup,” or “Push Button Configuration” (often in the Wireless or Advanced section). Disable it completely. Some routers have both a button method and a PIN method—disable both. There’s no legitimate reason to keep WPS enabled on a home network.

    If your router has a physical WPS button on the outside, disabling the feature in software usually deactivates the button too. You can verify this by trying to use WPS after disabling it—it should fail.

    router settings page showing WPS disabled with red X icon

    Step 5: Update Your Router’s Firmware

    Router firmware is the software that runs your router. Manufacturers regularly patch security vulnerabilities, but routers don’t auto-update like phones or computers. Running outdated firmware is like leaving a window open for hackers who know exactly which vulnerabilities your router has.

    In your router’s admin panel, find “Firmware Update,” “Router Update,” or “System Upgrade” (usually under Administration or Advanced). Check for updates. If one is available, download and install it. This process takes 5-10 minutes and will reboot your router—your internet will be down briefly.

    Enable automatic updates if your router supports them. If not, set a calendar reminder to check manually every 3 months. Some newer routers from brands like Asus, Netgear, and TP-Link now include auto-update features—enable them.

    Step 6: Change Your Network Name (SSID)

    Your network name (SSID) shouldn’t reveal your router model or personal information. Default names like “NETGEAR37” or “Linksys-5G” tell hackers exactly what hardware you’re running, making targeted attacks easier. Names like “Smith Family WiFi” reveal who lives there.

    Find the “Wireless Settings” or “SSID” section in your router admin panel. Change the network name to something generic and non-identifying. “Home Network 5G” or “Apartment 4B” work fine. Avoid inside jokes, addresses, or anything that identifies you or your equipment.

    While you’re here, disable “SSID Broadcast” if you want your network hidden from casual WiFi scans. This adds a minor layer of security—your network won’t appear in the list when neighbors search for WiFi. However, determined attackers can still detect hidden networks, so don’t rely on this as primary protection. For most home users, keeping the SSID visible but generic is fine.

    Step 7: Set Up a Guest Network

    Guest networks create a separate WiFi connection for visitors and IoT devices. This isolates them from your main network where your computers, phones, and sensitive data live. If a guest’s infected laptop or your smart lightbulb gets compromised, the attacker can’t pivot to your primary devices.

    Look for “Guest Network,” “Guest Access,” or “Multiple SSIDs” in your router settings. Enable the guest network and give it a different name (like “Guest WiFi”). Set a separate password—it can be simpler than your main network password since you’ll share it with visitors. Enable “Client Isolation” or “AP Isolation” if available—this prevents guest devices from seeing each other.

    Connect all your smart home devices (security cameras, smart speakers, smart TVs) to the guest network instead of your main network. These devices often have poor security and rarely receive updates. Keeping them isolated limits the damage if one gets hacked. Your main network should only include trusted computers, phones, and tablets.

    router admin interface showing guest network configuration with isolation enabled

    Common Mistakes That Undermine WiFi Security

    Using the same password for WiFi and router admin: If someone cracks your WiFi password (maybe you gave it to a visitor who wrote it down), they shouldn’t automatically have access to change your router settings. Always use different passwords for these two functions.

    Forgetting to reconnect devices after security changes: When you change your WiFi password or encryption type, every device disconnects. You must manually reconnect each one with the new password. If you skip a device, it won’t have network access—and you might not notice until you need it.

    Disabling the firewall to “fix” connection issues: Your router’s built-in firewall blocks unsolicited incoming connections. Some users disable it when troubleshooting, then forget to re-enable it. Never leave your firewall disabled. If you’re having connection problems, there’s always a better solution than removing your primary defense.

    Enabling remote management without understanding the risks: Remote management lets you access your router’s admin panel from outside your home network. Unless you specifically need this (and know how to secure it with VPN access), keep it disabled. It’s a common attack vector.

    Ignoring connected device lists: Your router shows all devices currently connected to your network. Review this list monthly. If you see unknown devices, change your WiFi password immediately—someone unauthorized has access.

    How to Verify Your Security Changes Worked

    After completing all seven steps, verify your security improvements. First, try connecting a device using your old WiFi password—it should fail. Try accessing your router admin panel with the old admin password—it should also fail. These failures confirm your password changes took effect.

    Check your router’s security settings one more time. Confirm WPA2 or WPA3 is enabled, WPS is disabled, and firmware is current. Look at the connected devices list—you should recognize every device. If you enabled guest network isolation, try accessing your main computer from a device on the guest network—it should be blocked.

    For advanced verification, you can use free tools like WiFi Analyzer (Android) or NetSpot (Mac/Windows) to scan your network and confirm encryption type. These apps show your network’s security protocol from an outside perspective, verifying what attackers would see.

    Next Steps: Additional WiFi Security Improvements

    Once you’ve completed the essential seven steps, consider these advanced protections:

    Enable MAC address filtering: Every device has a unique MAC address. Your router can whitelist only approved devices, blocking everything else. This adds friction (you must manually approve new devices), but it’s valuable for high-security needs.

    Disable unused services: Many routers run services like UPnP, Telnet, or SSH that most home users never need. Each enabled service is a potential attack surface. In your router’s advanced settings, disable any service you don’t actively use.

    Set up a VPN at the router level: Instead of running VPN software on each device, configure your router to route all traffic through a VPN. This protects every device automatically, including smart home gadgets that can’t run VPN apps. This requires a VPN-capable router and a VPN subscription.

    Replace your ISP’s router: Internet service providers often supply low-quality routers with limited security features and slow update cycles. Buying your own router (from brands like Asus, Netgear, or Ubiquiti) gives you better security controls and performance. Budget $100-200 for a quality home router.

    Implement network monitoring: Tools like Firewalla or Fingbox sit on your network and alert you to suspicious activity, new devices, or known malicious connections. These are overkill for most homes but valuable if you work from home or handle sensitive data.

    For additional security layers beyond your network, review our guides on Stop Browsing as Administrator: The #1 Security Mistake Windows Users Make and SMS vs MFA: Why I Stopped Using Text Messages for 2FA in (2026) to protect your devices even if your WiFi is compromised.

    Frequently Asked Questions

    How often should I change my WiFi password?

    Change your WiFi password every 6-12 months, or immediately if you suspect unauthorized access or after giving it to someone you no longer trust. Unlike account passwords that face constant automated attacks, WiFi passwords are primarily at risk from people who’ve had physical proximity to your network. A strong, random password rarely needs changing unless potentially compromised.

    Will these security changes slow down my internet speed?

    No, enabling WPA3 or WPA2 encryption has negligible performance impact on modern routers and devices. The encryption happens at hardware speed. You might notice a brief interruption when applying settings, but your day-to-day speeds will remain the same. In fact, removing unauthorized users from your network often improves speed by reducing congestion.

    What if my smart home devices won’t connect after enabling WPA3?

    Many older smart home devices only support WPA2. If devices fail to connect after enabling WPA3, switch to “WPA2/WPA3 Mixed Mode” in your router settings. This allows both protocols simultaneously. Alternatively, connect legacy devices to your guest network running WPA2, keeping your main network on pure WPA3 for maximum security.

    Can I hide my WiFi network completely to make it invisible to hackers?

    Disabling SSID broadcast hides your network from casual WiFi lists, but it doesn’t make you invisible to determined attackers. Hackers use tools that detect hidden networks easily. SSID hiding adds minor inconvenience for attackers and major inconvenience for you (connecting new devices is harder). Focus on strong encryption and passwords instead—hiding your network is security theater.

    Do I need to secure my 5GHz and 2.4GHz bands separately?

    Most modern routers let you configure both bands together with the same security settings, but some require separate configuration. Check both in your router settings. Apply the same security measures (WPA3/WPA2, strong password, WPS disabled) to both bands. If your router offers separate names for each band, that’s fine—just ensure both have identical security settings.

  • How to Set Up a Home Network Firewall Step by Step (2026 Guide)

    How to Set Up a Home Network Firewall Step by Step (2026 Guide)

    What You’ll Learn and Why It Matters

    Setting up a home network firewall is one of the most effective ways to protect all your devices from external threats. Unlike antivirus software that runs on individual computers, a network firewall sits between your home network and the internet, blocking malicious traffic before it reaches any device.

    This article contains affiliate links. PacketMoat may earn a commission at no extra cost to you when you purchase through these links. This helps support our cybersecurity research and content creation.

    This guide walks you through how to set up a home network firewall step by step, covering both router-based firewalls (which most people already have) and dedicated hardware firewall solutions. You’ll learn to configure rules, test your protection, and avoid common mistakes that leave networks vulnerable.

    By the end, you’ll have a properly configured firewall protecting every device on your network—computers, phones, smart home devices, and IoT gadgets that often lack their own security measures.

    Prerequisites: What You Need Before Starting

    Before you begin configuring your home network firewall, gather these essentials:

    • Router admin access: You need the username and password to log into your router’s configuration interface (usually printed on a sticker on the router itself)
    • A computer connected to your network: Wired ethernet connection is best for configuration to avoid being locked out
    • Your router’s IP address: Typically 192.168.1.1 or 192.168.0.1 (check your router documentation)
    • 30-45 minutes of uninterrupted time: You’ll need to test changes and may temporarily lose internet access during configuration

    If you’re setting up a dedicated hardware firewall, you’ll also need the firewall device itself and an additional ethernet cable. Popular options include the Firewalla Gold for home users or enterprise-grade options like Ubiquiti’s UniFi Security Gateway.

    Step 1: Access Your Router’s Firewall Settings

    router login page showing admin authentication screen in web browser

    Your router almost certainly has a built-in firewall—it’s just a matter of accessing and configuring it properly. Open a web browser and type your router’s IP address into the address bar. For most routers, this is 192.168.1.1, 192.168.0.1, or 192.168.2.1.

    Enter your admin credentials when prompted. If you’ve never changed these, check the sticker on your router or search for your router model’s default login online. Critical first step: Change the default admin password immediately—default credentials are publicly known and represent a massive security vulnerability.

    Once logged in, look for sections labeled “Firewall,” “Security,” “Advanced Settings,” or “WAN Settings.” The exact location varies by manufacturer (Netgear, TP-Link, Asus, etc.), but firewall controls are typically under security or advanced menus.

    Step 2: Enable Basic Firewall Protection

    Most modern routers have their firewall enabled by default, but verify this setting. Look for an option to “Enable SPI Firewall” or “Enable Firewall Protection.” SPI (Stateful Packet Inspection) is the standard firewall technology that tracks connection states and blocks unsolicited incoming traffic.

    Enable these essential firewall features if available:

    • Block WAN requests: Prevents external devices from pinging or detecting your router
    • DoS protection: Defends against denial-of-service attacks that flood your network
    • Port scan detection: Alerts you when someone is probing your network for vulnerabilities
    • IP flood detection: Blocks suspicious traffic patterns that indicate attacks

    These settings provide baseline protection against common internet threats. Apply the changes and wait for your router to restart if required.

    Step 3: Configure Inbound and Outbound Rules

    firewall rules configuration screen showing inbound and outbound traffic settings

    This is where you define what traffic can enter and leave your network. The principle of least privilege applies: block everything by default, then allow only what you need.

    Inbound rules control traffic coming from the internet to your devices. For most home networks, you should block ALL inbound connections unless you’re running a server or need remote access. Your firewall’s default “deny all inbound” stance is correct—don’t change it unless you have a specific reason.

    Outbound rules control traffic leaving your network. Most home routers allow all outbound traffic by default, which works for typical usage. However, if you want maximum security, you can create rules to block suspicious outbound connections or restrict specific devices (like IoT cameras) from accessing the internet entirely.

    To create a custom rule, you’ll typically specify: protocol (TCP/UDP), port number, source IP (device on your network), and destination (internet address or range). Start conservatively—overly restrictive rules will break legitimate services.

    Step 4: Set Up Port Forwarding Carefully (If Needed)

    Port forwarding creates exceptions in your firewall to allow specific external traffic to reach devices on your network. Common uses include gaming consoles, security cameras, or remote desktop access. However, each forwarded port is a potential vulnerability.

    If you must forward ports, follow these security practices:

    • Forward only the minimum required ports: Don’t open port ranges unless absolutely necessary
    • Use non-standard ports when possible: Change default ports (like 22 for SSH) to reduce automated attacks
    • Implement IP whitelisting: Restrict access to specific external IP addresses if you know where connections will originate
    • Enable logging: Monitor forwarded ports for suspicious access attempts

    Better alternatives exist for most port forwarding scenarios. VPNs provide secure remote access without exposing ports. Cloud-based services eliminate the need for direct home network access. Consider these options before opening your firewall.

    Step 5: Enable DMZ for Isolated Devices (Advanced)

    A DMZ (Demilitarized Zone) is a separate network segment for devices that need internet exposure but shouldn’t have access to your main network. This is advanced configuration, but valuable if you run servers or have IoT devices you don’t fully trust.

    Many consumer routers offer a simplified “DMZ host” feature that places one device outside the firewall. This is actually less secure than true DMZ segmentation—it exposes that device completely. If your router supports VLANs (Virtual LANs), use those to create proper network isolation instead.

    For true DMZ capability, consider upgrading to a business-class router or dedicated firewall that supports multiple network interfaces and sophisticated routing rules.

    Step 6: Configure Device-Specific Firewall Rules

    network diagram showing different devices with individual firewall rules applied

    Modern threats often target the weakest link in your network—usually IoT devices with poor security. Your firewall can restrict what each device can do, even if the device itself has no security features.

    Create rules based on device MAC addresses to:

    • Block IoT devices from internet access: Smart home devices often work fine on your local network without internet connectivity
    • Restrict smart TVs: Prevent data collection by blocking their connections to analytics servers while allowing streaming services
    • Isolate guest devices: Use guest network features with firewall rules that prevent access to your main network resources
    • Limit children’s devices: Control when and where kids’ devices can connect

    This granular control turns your firewall into a powerful network management tool beyond just security. The Stop Browsing as Administrator: The #1 Security Mistake Windows Users Make principle applies to networks too—devices should have minimum necessary access.

    Step 7: Install Dedicated Firewall Hardware (Optional but Recommended)

    Consumer router firewalls provide basic protection, but dedicated firewall hardware offers significantly more capability. If you work from home, run a small business, or have high security requirements, this upgrade is worthwhile.

    Dedicated firewalls provide:

    • Deep packet inspection: Examines the content of network traffic, not just headers
    • Intrusion detection/prevention (IDS/IPS): Identifies and blocks attack patterns in real-time
    • Application-level filtering: Controls specific apps and services, not just ports
    • Advanced logging and reporting: Detailed visibility into network activity
    • VPN server capability: Secure remote access to your home network

    The Firewalla Gold is popular for home users who want enterprise-grade protection without complexity. It sits between your modem and router, inspecting all traffic in both directions. Setup takes about 20 minutes using their mobile app.

    For technically advanced users, pfSense or OPNsense running on dedicated hardware provides maximum control and capability. These open-source firewall platforms rival commercial enterprise solutions but require networking knowledge to configure properly.

    Step 8: Configure Firewall Logging and Monitoring

    A firewall that doesn’t log is like a security camera that doesn’t record—you won’t know about threats until damage is done. Enable logging for blocked connections, security events, and configuration changes.

    Most router firewalls offer basic logging in the admin interface. Review logs weekly to identify:

    • Repeated block attempts: Someone may be targeting your network
    • Unusual outbound connections: Could indicate compromised devices
    • Failed login attempts: Attacks on your router’s admin interface
    • Port scan activity: Automated tools probing for vulnerabilities

    Dedicated firewalls offer sophisticated monitoring with real-time alerts and historical analysis. Set up email or mobile notifications for critical security events so you can respond quickly to threats.

    Common Mistakes to Avoid

    warning symbol with common firewall misconfigurations displayed on screen

    Mistake #1: Using default admin credentials. This is the most dangerous oversight. Attackers have databases of default router passwords and actively scan for vulnerable devices. Change your router’s admin password to something unique and strong—consider using a Best Password Managers for Remote Teams (2026 Review) to generate and store it.

    Mistake #2: Disabling the firewall to troubleshoot connectivity issues. When something doesn’t work, people often disable the firewall “temporarily” and forget to re-enable it. Instead, create specific rules to allow the traffic you need while maintaining protection.

    Mistake #3: Forwarding ports without understanding the risk. Every open port is an attack surface. Many devices that request port forwarding actually work fine with UPnP (Universal Plug and Play) or don’t need direct access at all. Research alternatives before opening your firewall.

    Mistake #4: Ignoring firmware updates. Router manufacturers regularly patch security vulnerabilities in firewall software. Enable automatic updates if available, or check monthly for new firmware. An outdated firewall can be bypassed by known exploits.

    Mistake #5: Trusting devices on your network implicitly. Your firewall protects against external threats, but compromised internal devices can attack other devices on your network. This is why network segmentation and device-specific rules matter—assume any device could be compromised.

    Verify Your Firewall is Working Properly

    Configuration means nothing without verification. Test your firewall to confirm it’s actually protecting your network.

    Test 1: Port scan from outside your network. Use ShieldsUP! (grc.com/shieldsup) or similar online port scanning tools to probe your external IP address. All ports should show as “stealth” (not responding) or “closed.” Any “open” ports are potential vulnerabilities unless you specifically forwarded them.

    Test 2: Check for IP leaks. Visit whatismyipaddress.com and verify it shows your ISP-assigned IP address, not your internal network address. If internal IPs are visible, your router’s NAT (Network Address Translation) isn’t working correctly.

    Test 3: Verify inbound blocking. Try to access your router’s admin interface from a device outside your network (using cellular data, not your home WiFi). You should not be able to reach the login page. If you can, remote administration is enabled—disable it unless absolutely necessary.

    Test 4: Confirm device isolation. If you configured device-specific rules, verify they work. For example, if you blocked an IoT camera from internet access, confirm it can’t reach external sites while still functioning on your local network.

    Run these tests after initial setup and again whenever you make configuration changes. Regular verification ensures your firewall remains effective as your network evolves.

    Next Steps: Additional Network Security Improvements

    A properly configured firewall is foundational security, but not sufficient by itself. Layer additional protections to create defense in depth.

    Implement network segmentation. Use VLANs or separate WiFi networks to isolate device types. Keep IoT devices on a separate network from computers and phones. This limits the damage if any single device is compromised. The Why You Need a Travel Router for Hotels (2026 Guide) concept applies at home too—create isolated networks for untrusted devices.

    Set up a VPN for remote access. Instead of port forwarding for remote access, configure a VPN server on your router or firewall. This provides encrypted, authenticated access to your home network without exposing services directly to the internet. Many modern routers include OpenVPN or WireGuard server capability.

    Enable DNS filtering. Configure your router to use DNS services that block malicious domains (like Cloudflare’s 1.1.1.2 or Quad9). This adds another layer of protection by preventing devices from even reaching known malicious sites, regardless of firewall rules.

    Deploy endpoint protection. Your firewall protects the network perimeter, but devices still need their own security. Ensure every computer has updated antivirus software and enable built-in firewalls on individual devices as a second layer of defense.

    Secure your physical network. Firewall configuration is meaningless if someone can physically plug into your network. Disable unused ethernet ports on your router, secure your router in a locked location if possible, and implement MAC address filtering on WiFi networks as an additional barrier.

    Network security is not a one-time setup—it requires ongoing maintenance. Review your firewall rules quarterly, update firmware promptly, and monitor logs for suspicious activity. The effort investment in learning how to set up a home network firewall step by step pays dividends in long-term protection for all your connected devices.

  • The 10 Essential Steps to Securing Your OpenClaw: A Complete Hardware & Software Guide

    The 10 Essential Steps to Securing Your OpenClaw: A Complete Hardware & Software Guide

    Updated: February 17, 2026 by PacketMoat Team

    PacketMoat is reader-supported. When you buy through links on our site, we may earn an affiliate commission at no extra cost to you.


    🚨 FEB 16 UPDATE: OpenAI Foundation Pivot

    With the OpenAI Foundation officially taking over OpenClaw (Feb 16), adoption is skyrocketing—but so are the attacks. A recent audit by CyberArk revealed that 78% of new instances are vulnerable to the new CVE-2026-25593 exploit. This guide covers the “Digital Cage” method to secure your node immediately.


    Running OpenClaw without proper security is like leaving your front door open with a sign that says “Server Room Inside.” Whether you’re a developer experimenting at home or a business deploying AI agents in production, these 10 steps will transform your OpenClaw setup from vulnerable to virtually impenetrable.

    Table of Contents

    • Step 1: Invest in Dedicated Hardware – Why Your Laptop Isn’t Enough
    • Step 2: Set Up a Hardware Firewall for Network Isolation
    • Step 3: Install and Configure Docker with Security-First Settings
    • Step 4: Create a Minimal, Hardened Container Image
    • Step 5: Implement Strict API Key Management
    • Step 6: Configure Network Segmentation with VLANs
    • Step 7: Enable Comprehensive Logging and Monitoring
    • Step 8: Set Up Automated Backup and Disaster Recovery
    • Step 9: Implement Multi-Factor Authentication (MFA)
    • Step 10: Create an Incident Response Plan
    • The Complete Security Checklist
    • Recommended Hardware Shopping List

    Step 1: Invest in Dedicated Hardware – Why Your Laptop Isn’t Enough

    The Problem: Running OpenClaw on your daily-use laptop or desktop creates massive security risks. If the AI agent is compromised, attackers gain access to everything on that machine—your email, banking apps, company VPN, and personal files.

    The Solution: Use dedicated hardware that runs nothing but OpenClaw. This creates an air gap between your AI experiments and your critical data.

    Why Dedicated Hardware is Mandatory

    Security professionals consistently recommend isolating OpenClaw on separate metal. Here are the top choices for 2026:

    🏆 GOLD STANDARD: Apple Mac Mini M2

    Configuration for OpenClaw Security:

    • M2 Chip with 8-core CPU
    • 16GB Unified Memory (minimum for Docker)
    • 512GB SSD (for logs and workspace isolation)
    • Gigabit Ethernet (more secure than WiFi)

    → Check Current Price on Amazon

    Price typically ranges from $799-$999. Avoid the base 8GB model—Docker will struggle.

    💰 BUDGET PICK: Beelink SER5 Mini PC

    Why it wins for OpenClaw: Unlike the Mac Mini, this runs Linux natively (no Docker overhead) and allows for cheap RAM upgrades.

    • AMD Ryzen 7 (8-core) – Crushes Docker workloads
    • 16GB RAM (Upgradable to 64GB)
    • Native Ubuntu/Debian support
    • In Stock & Ready to Ship

    → Check Beelink Price on Amazon (~$300)

    Pro Tip: Use the extra cash you save to buy the hardware firewall below.

    ⚠️ Critical: Do NOT run OpenClaw on a Raspberry Pi. While technically possible, the limited RAM (8GB max) causes constant crashes under Docker workloads.


    Step 2: Set Up a Hardware Firewall for Network Isolation

    The Problem: Software firewalls can be disabled or bypassed if your machine is compromised. A hardware firewall creates a physical barrier that’s much harder to defeat.

    Best for Beginners: GL.iNet Beryl AX (Travel Router)

    This router physically separates your AI node from your home WiFi:

    • WiFi 6 for fast connections
    • Guest network isolation (perfect for OpenClaw)
    • Built-in VPN client/server

    GL.iNet Beryl AX on Amazon – $89


    Step 3: Install and Configure Docker with Security-First Settings

    The Solution: Install Docker with hardened security settings and configure proper resource limits.

    Secure Docker Installation (macOS & Linux)

    Create /etc/docker/daemon.json with these security settings:

    {
      "icc": false,
      "userns-remap": "default",
      "log-driver": "json-file",
      "log-opts": {
        "max-size": "10m",
        "max-file": "5"
      },
      "live-restore": true,
      "userland-proxy": false,
      "no-new-privileges": true
    }

    Step 4: Create a Minimal, Hardened Container Image

    The Solution: Build a minimal container using Alpine Linux to reduce attack surface.

    # Use Alpine Linux for minimal attack surface
    FROM alpine:3.19
    
    # Create non-root user
    RUN addgroup -g 1000 openclaw && \
        adduser -D -u 1000 -G openclaw openclaw
    
    # Install ONLY essential packages
    RUN apk add --no-cache python3 py3-pip git && \
        rm -rf /var/cache/apk/*
    
    # Switch to non-root user
    USER openclaw
    
    # Expose only necessary port
    EXPOSE 8080
    
    CMD ["python3", "openclaw_server.py"]

    Step 5: Implement Strict API Key Management

    The Problem: Hardcoded API keys are the #1 cause of security breaches in AI deployments.

    The Solution: Use environment variables exclusively. NEVER store keys in a .env file inside the container.

    # Run container with environment injection
    docker run -d \
      --name openclaw-prod \
      -e ANTHROPIC_API_KEY="${ANTHROPIC_API_KEY}" \
      -e OPENAI_API_KEY="${OPENAI_API_KEY}" \
      openclaw-secure:v1.0

    Step 9: Implement Multi-Factor Authentication (MFA)

    The Solution: Add a second factor of authentication using hardware tokens or authenticator apps.

    YubiKey 5C NFC – Hardware Authentication Token

    Why security professionals choose YubiKey:

    • Phishing-resistant hardware authentication
    • Works with SSH, GPG, and FIDO2
    • Tap-to-authenticate is faster than typing codes

    → YubiKey 5C NFC on Amazon – $55


    Step 10: Create an Incident Response Plan

    Phase 1: Identification & Containment

    # IMMEDIATE: Isolate the container
    docker pause openclaw-prod
    docker network disconnect openclaw-net openclaw-prod
    
    # Preserve evidence
    docker logs openclaw-prod > /tmp/incident-logs-$(date +%s).txt

    If you suspect a breach:

    1. Rotate all API keys immediately.
    2. Destroy the container.
    3. Scan your host machine for persistence.

    Recommended Hardware Shopping List

    Here’s everything you need to build a secure OpenClaw deployment from scratch:

    Item Purpose Price Link
    Mac Mini M2 (16GB) Dedicated OpenClaw machine $799 Amazon
    Beelink SER5 (Budget) Native Linux Alternative ~$300 Amazon
    GL.iNet Beryl AX Hardware firewall/router $89 Amazon
    YubiKey 5C NFC (×2) Hardware MFA $110 Amazon

    Final Thoughts: Security is a Journey

    The OpenAI Foundation pivot is a massive step forward, but the threat remains. Make sure you’re part of the 22% deploying securely—not the 78% waiting for a breach to learn these lessons the hard way.

    Questions about your OpenClaw security setup? Check out our other guides:

  • Ultimate OpenClaw Defense: 5 Steps to Stop AI Agent Attacks

    Ultimate OpenClaw Defense: 5 Steps to Stop AI Agent Attacks

    January 29, 2026 by PacketMoat Team

    PacketMoat is reader-supported. When you buy through links on our site, we may earn an affiliate commission at no extra cost to you.


    ⚠️ FEB 16 UPDATE: THE OPENAI FOUNDATION PIVOT

    OpenClaw has officially moved to an independent foundation supported by OpenAI.

    CRITICAL: If you are running a version older than v2026.2.12, your node is vulnerable to CVE-2026-25593 (Remote Code Execution).

    Action Required: Update your instance immediately and follow the “Digital Cage” steps below to sandbox your agent.


    OpenClaw (also known as Moltbot or Clawdbot) is essentially Claude with hands—an AI agent that can interact with your computer like a human would. But if you don’t cage it properly, you’re leaving your digital front door wide open. Here’s how to run OpenClaw without losing your data—or your job.

    Table of Contents

    • The Shadow AI Crisis That’s Keeping CISOs Awake
    • Understanding What Makes OpenClaw Powerful (And Dangerous)
    • Step 1: The Sandbox Rule – Run OpenClaw Exclusively in Docker
    • Step 2: Tool Whitelisting – Disable Terminal Access
    • Step 3: API Key Isolation – Never Store Keys in Plain Text
    • Step 4: Network Segmentation – Isolate Your AI Traffic
    • Step 5: The “Human-in-the-Loop” Check – No Auto-Approve
    • Real-World Security Implementation
    • Emergency Response Procedures
    • The Bottom Line: Secure AI Agents Are the Only Safe AI Agents

    The Shadow AI Crisis That’s Keeping CISOs Awake

    As we head deeper into 2026, the biggest threat to enterprise security isn’t sophisticated nation-state attacks—it’s your own employees. They’re installing AI agents like OpenClaw on company laptops to boost productivity, completely unaware they’re essentially handing over the keys to the kingdom.

    Security researchers at SlowMist and Hudson Rock have already identified hundreds of exposed OpenClaw instances leaking API keys, customer data, and private chat logs. The recent pivot to the OpenAI Foundation might be brilliant for the product’s longevity, but it’s created a perfect storm of “Shadow AI” adoption that’s flying completely under IT radar.

    Understanding What Makes OpenClaw Powerful (And Dangerous)

    Unlike traditional chatbots that just generate text, OpenClaw is an autonomous AI agent that can:

    • Execute terminal commands with your user privileges
    • Read and modify files across your entire system
    • Access browser sessions and stored passwords
    • Interact with APIs using your credentials
    • Move data between applications seamlessly

    This level of system access is what makes it incredibly productive—and incredibly risky if not properly secured.


    Step 1: The Sandbox Rule – Run OpenClaw Exclusively in Docker

    The Problem: By default, OpenClaw often runs with excessive host access, essentially operating as a privileged user on your system with direct access to sensitive local files and accounts.

    The Fix: Sandbox OpenClaw in a Docker container. This is hands-down the most critical security step you can take.

    Why Docker Containerization Works

    Docker containers create an isolated environment that prevents the agent from accessing sensitive local files, user accounts, or system directories. Even if OpenClaw gets compromised, the attack is contained within the container boundaries—it can’t spread to your host system.

    ⚠️ HARDWARE WARNING: Docker uses massive amounts of RAM. If you try this on a MacBook Air, it will crash. We recommend a dedicated M2 Mac Mini for isolation—see our hardware guide for specific recommendations.

    Setting Up Your Docker Sandbox

    Pro Tip #1: While OpenClaw provides an automatic docker-setup.sh script for convenience, manually building the container as shown below ensures you control exactly what dependencies are installed. This gives you complete visibility into your security posture and prevents any unwanted packages from sneaking into your environment.

    # Dockerfile for OpenClaw
    FROM ubuntu:22.04
    
    # Create non-root user for OpenClaw
    RUN useradd -m -s /bin/bash openclaw
    
    # Install only necessary dependencies
    RUN apt-get update && apt-get install -y \
        git \
        curl \
        python3 \
        python3-pip \
        && rm -rf /var/lib/apt/lists/*
    
    # Set working directory
    WORKDIR /home/openclaw/workspace
    
    # Switch to non-root user
    USER openclaw
    
    # Copy only necessary files
    COPY --chown=openclaw:openclaw ./workspace ./
    
    EXPOSE 8080
    
    CMD ["openclaw", "start"]

    Secure Docker Deployment:

    docker run -d \
      --name openclaw-secure \
      -e ANTHROPIC_API_KEY="${ANTHROPIC_API_KEY}" \
      -e OPENAI_API_KEY="${OPENAI_API_KEY}" \
      -v ./workspace:/home/openclaw/workspace:rw \
      --network none \
      --read-only \
      --tmpfs /tmp \
      --security-opt no-new-privileges:true \
      openclaw-secure

    Pro Tip #2 – Critical API Key Warning: Here’s something that catches even experienced developers off guard—OpenClaw stores API keys in plain text in .env or config files by default. Even with Docker containerization, those keys are still visible inside the container if stored in files. The “Digital Cage” approach shown above uses environment variable injection, which is far superior to saving credentials in files. Never commit API keys to your container image or mount config files containing secrets.


    Step 2: Tool Whitelisting – Disable Terminal Access

    The Problem: Giving OpenClaw full system access is like handing someone the master key to your entire digital life.

    The Solution: Disable the “Terminal” tool unless you are using a dedicated, air-gapped machine like a Mac Mini. Whitelist specific tools rather than granting broad system access.

    Recommended Tool Whitelist

    Instead of allowing access to every command-line tool, restrict OpenClaw to only essential utilities:

    {
      "agents": {
        "defaults": {
          "safeBins": [
            "git",
            "ls", 
            "cat",
            "echo",
            "grep",
            "find",
            "mkdir",
            "cp",
            "mv"
          ],
          "blockedBins": [
            "sudo",
            "su",
            "chmod",
            "chown",
            "rm",
            "rmdir",
            "curl",
            "wget",
            "ssh",
            "scp",
            "bash",
            "sh"
          ]
        }
      }
    }

    File System Access Control

    Limit OpenClaw’s file system access to specific directories:

    {
      "sandbox": {
        "allowedPaths": [
          "/home/user/openclaw-workspace",
          "/tmp/openclaw-temp"
        ],
        "blockedPaths": [
          "/etc",
          "/var", 
          "~/.ssh",
          "~/.aws",
          "~/Documents",
          "~/Downloads",
          "~/Desktop"
        ]
      }
    }

    Important: If you’re running OpenClaw on a dedicated Mac Mini that’s network-isolated, you can be slightly more permissive with terminal access. But on your main work laptop? Keep it locked down tight.


    Step 3: API Key Isolation – Never Store Keys in Plain Text

    The Problem: Storing your OpenAI or Anthropic keys in plain text configuration files is a recipe for disaster. Even inside a Docker container, these files can be exposed through logs, volume mounts, or container inspection.

    The Solution: Use environment variables exclusively and implement regular key rotation.

    Secure API Key Management

    DO THIS:

    # Store keys in your host environment (add to ~/.bashrc or ~/.zshrc)
    export ANTHROPIC_API_KEY="sk-ant-xxxxxxxxxxxxx"
    export OPENAI_API_KEY="sk-xxxxxxxxxxxxx"
    
    # Inject them at runtime
    docker run -d \
      --name openclaw-secure \
      -e ANTHROPIC_API_KEY="${ANTHROPIC_API_KEY}" \
      -e OPENAI_API_KEY="${OPENAI_API_KEY}" \
      openclaw-secure

    DON’T DO THIS:

    # Never store keys in files inside the container
    # Never do this:
    # echo "ANTHROPIC_API_KEY=sk-ant-xxxxx" > .env
    # docker run -v ./.env:/app/.env openclaw

    API Key Rotation Schedule

    Set up automatic reminders to rotate your keys:

    • Development environments: Every 30 days
    • Production environments: Every 14 days
    • After any suspected compromise: Immediately

    Key Rotation Script

    #!/bin/bash
    # rotate-openclaw-keys.sh
    
    echo "Rotating API keys..."
    
    # Stop the container
    docker stop openclaw-secure
    
    # Generate new keys (manually through provider dashboards)
    # Then update your environment variables
    
    # Restart with new keys
    docker start openclaw-secure
    
    echo "API keys rotated successfully"

    Step 4: Network Segmentation – Isolate Your AI Traffic

    The Problem: Running OpenClaw on the same network as your banking devices, personal phones, and work computers creates unnecessary risk. If the agent is compromised, attackers can potentially pivot to other devices on your network.

    The Solution: Use a dedicated VLAN or a travel router to keep your AI traffic completely isolated from your critical devices.

    Option 1: Dedicated VLAN (Advanced)

    If you have a managed switch and router, create a separate VLAN specifically for AI workloads:

    VLAN 1 (Default): Your phones, laptops, banking devices
    VLAN 10 (AI Sandbox): Mac Mini running OpenClaw only

    Configure your firewall to:

    • Block VLAN 10 from accessing VLAN 1
    • Allow VLAN 10 to access only the internet
    • Log all traffic from VLAN 10 for audit purposes

    Option 2: Travel Router (Beginner-Friendly)

    Purchase a cheap travel router ($30-50) and connect your dedicated Mac Mini to it:

    1. Connect the travel router to your main network via Ethernet
    2. Connect your Mac Mini running OpenClaw to the travel router’s network
    3. Configure the travel router to isolate clients from each other
    4. Your OpenClaw instance can access the internet but not your other devices

    Recommended Travel Routers:

    • GL.iNet GL-MT300N-V2 (Mango)
    • TP-Link TL-WR902AC
    • RAVPower FileHub

    Network Isolation Docker Configuration

    # Create an isolated Docker network
    docker network create --driver bridge \
      --subnet=172.25.0.0/16 \
      --opt com.docker.network.bridge.enable_icc=false \
      openclaw-net
    
    # Run OpenClaw on the isolated network
    docker run -d \
      --name openclaw-secure \
      --network openclaw-net \
      --ip 172.25.0.2 \
      -e ANTHROPIC_API_KEY="${ANTHROPIC_API_KEY}" \
      -e OPENAI_API_KEY="${OPENAI_API_KEY}" \
      openclaw-secure

    Step 5: The “Human-in-the-Loop” Check – No Auto-Approve

    The Problem: Giving your agent “Auto-Approve” permissions for financial or system-level changes is the fastest way to disaster. One misconfigured prompt or malicious injection could result in unauthorized transactions, data deletion, or system compromise.

    The Solution: Never enable auto-approve for sensitive operations. Always require explicit human confirmation.

    Configure Human-in-the-Loop Controls

    {
      "gateway": {
        "bind": "127.0.0.1",
        "port": 8080,
        "auth": {
          "token": "YOUR_STRONG_RANDOM_TOKEN_HERE",
          "tokenRotationDays": 30
        }
      },
      "agents": {
        "defaults": {
          "approvalRequired": true,
          "autoApprove": false,
          "approvalCategories": {
            "fileModification": "manual",
            "fileCreation": "manual",
            "fileDeletion": "manual",
            "terminalCommands": "manual",
            "apiCalls": "manual",
            "networkRequests": "manual"
          },
          "highRiskActions": {
            "financial": {
              "autoApprove": false,
              "requireMFA": true,
              "cooldownMinutes": 5
            },
            "systemLevel": {
              "autoApprove": false,
              "requireMFA": true,
              "logEverything": true
            }
          }
        }
      },
      "security": {
        "notifyOnHighRisk": true,
        "notificationChannels": ["email", "sms"],
        "sessionRecording": true
      }
    }

    What Should Always Require Approval

    • Financial operations: Any API calls to payment processors, banks, or crypto exchanges
    • File deletions: Especially outside the designated workspace
    • System modifications: Changes to user accounts, permissions, or system settings
    • External API calls: Requests to third-party services with your credentials
    • Database operations: Any writes, updates, or deletes to production databases

    Best Practices for Human-in-the-Loop

    1. Review every action before approval – Don’t just click “yes” reflexively
    2. Set up approval timeouts – If you don’t respond in 5 minutes, the action is cancelled
    3. Enable session recording – Keep logs of what was approved and when
    4. Use MFA for high-risk actions – Require a second factor for financial operations
    5. Implement a cooldown period – Add a 5-minute delay before critical actions execute

    Example Approval Workflow:

    OpenClaw: "I need to delete 45 files from /workspace/old-projects"
    You: [Reviews the specific file list]
    You: [Approves only after verifying the files are correct]
    System: [Logs approval with timestamp and your user ID]
    OpenClaw: [Executes the deletion]
    System: [Records the action in audit log]

    Real-World Security Implementation

    Here’s how to put everything together into a production-ready deployment.

    Complete Docker Deployment Script

    #!/bin/bash
    # secure-openclaw-deploy.sh
    
    echo "Deploying OpenClaw with Digital Cage security..."
    
    # Build secure container
    docker build -t openclaw-secure:latest .
    
    # Create isolated network
    docker network create --driver bridge \
      --opt com.docker.network.bridge.enable_icc=false \
      openclaw-net
    
    # Run with all security restrictions
    docker run -d \
      --name openclaw-production \
      --network openclaw-net \
      --memory="512m" \
      --cpus="1.0" \
      --read-only \
      --tmpfs /tmp \
      --security-opt no-new-privileges:true \
      --cap-drop ALL \
      -e ANTHROPIC_API_KEY="${ANTHROPIC_API_KEY}" \
      -e OPENAI_API_KEY="${OPENAI_API_KEY}" \
      -v $(pwd)/workspace:/workspace:rw \
      -v $(pwd)/config:/config:ro \
      -p 127.0.0.1:8080:8080 \
      openclaw-secure:latest
    
    echo "✅ OpenClaw deployed securely with:"
    echo "   - Docker isolation"
    echo "   - Environment variable injection"
    echo "   - Network segmentation"
    echo "   - Read-only filesystem"
    echo "   - Memory limits"
    echo ""
    echo "Access your instance at http://127.0.0.1:8080"

    Weekly Security Audit Script

    #!/bin/bash
    # weekly-audit.sh
    
    echo "Running OpenClaw security audit..."
    
    # Run the built-in security audit
    openclaw security audit --detailed --output /var/log/openclaw-audit.log
    
    # Check container integrity
    docker exec openclaw-production openclaw security audit
    
    # Verify network isolation
    netstat -tulpn | grep :8080
    
    # Check for unauthorized file access
    find /workspace -type f -newer /tmp/last-audit -exec ls -la {} \;
    
    # Scan for exposed API keys in files (this should return nothing in a secure setup)
    docker exec openclaw-production find /workspace -name "*.env" -o -name "*.config" -exec grep -l "api.*key" {} \;
    
    # Update audit timestamp
    touch /tmp/last-audit
    
    echo "Security audit completed. Check /var/log/openclaw-audit.log for details."

    Emergency Response Procedures

    If You Suspect Compromise

    # Emergency shutdown procedure
    docker stop openclaw-production
    docker network disconnect openclaw-net openclaw-production
    iptables -A OUTPUT -p tcp --dport 443 -j DROP
    
    # Audit recent activity  
    openclaw security audit --emergency --last-24h
    
    # Check for API key exposure
    docker logs openclaw-production | grep -i "api.*key\|token"
    
    # Rotate all credentials immediately
    ./rotate-openclaw-credentials.sh

    Immediate Actions to Take:

    1. Isolate the container immediately – Stop all network access
    2. Preserve logs – Copy all logs before shutting down
    3. Rotate all API keys – OpenAI, Anthropic, and any other services
    4. Review recent actions – Check what the agent did in the last 24-48 hours
    5. Notify stakeholders – If business data was exposed, follow your incident response plan
    6. Rebuild from scratch – Don’t trust a compromised container

    Signs Your OpenClaw Instance May Be Compromised

    • Unexpected file modifications outside the workspace
    • Network connections to unknown IP addresses
    • Abnormal API usage patterns or costs
    • Unauthorized commands appearing in audit logs
    • Container restart attempts or crashes
    • Suspicious processes running inside the container

    The Bottom Line: Secure AI Agents Are the Only Safe AI Agents

    The five key pillars of OpenClaw security are non-negotiable:

    1. Docker containerization prevents system-level access and contains breaches
    2. Tool whitelisting limits potential damage by restricting terminal access
    3. API key isolation using environment variables prevents credential exposure
    4. Network segmentation keeps AI traffic away from critical devices
    5. Human-in-the-loop checks prevent unauthorized financial or system changes

    But remember the two critical implementation details that separate amateur deployments from professional-grade security:

    • Manual container builds give you complete control over your security posture
    • Environment variable injection prevents API key exposure even within your secure container

    Implementing these measures transforms OpenClaw from a potential security nightmare into a powerful, controlled productivity asset. The configuration above represents battle-tested best practices used by security professionals worldwide.

    Take action today. The autonomous AI revolution is happening whether you’re ready or not. Be the organization that deploys AI agents securely, not the cautionary tale at next year’s security conference.

    Remember: For optimal security and performance, check out our Best Mac Mini for OpenClaw Guide.


    Categories: PC & Network Defense

    Related Articles:

  • How to Test a Faraday Bag: The Simple Walk-Up Test (2026)

    How to Test a Faraday Bag: The Simple Walk-Up Test (2026)

    PacketMoat is reader-supported. When you buy through links on our site, we may earn an affiliate commission at no extra cost to you.

    Meta Description: Don’t trust claims—test it yourself. Learn the simple 30-second walk-up test that proves if your Faraday bag actually works or if you just wasted your money.


    Introduction

    I learned this the hard way: I bought three different Faraday bags on Amazon last month. They all looked the same. They all claimed to be “military grade.” But when I actually put them to the test? Only one of them worked. The other two were just fancy nylon pouches that did absolutely nothing.

    Here is the scary reality: Thieves can steal your car in about 30 seconds using a relay attack—amplifying the signal from the keys sitting on your kitchen counter to open your car door in the driveway. A Faraday bag is supposed to stop that cold.

    The problem is that the market is flooded with cheap knock-offs. People buy them, toss their keys inside, and assume they are safe. But you have no way of knowing if that mesh lining is actually blocking RF signals or just pretending to.

    The solution isn’t just buying the most expensive bag; it’s verification. I’m going to teach you the “Walk-Up Test.” It takes less than a minute, it costs nothing, and it is the only way to know for sure if your car is actually protected.

    By the end of this article, you’ll know exactly how to test a Faraday bag so you can sleep soundly knowing your vehicle isn’t going anywhere without you.

    Quick Answer: Which Bag Actually Works? I tested 15 different bags. If you are in a rush and just want the one that passed the Walk-Up Test, here is the winner:

    Budget Pick: [TICONN Faraday Bag (2-Pack) – Check Price] Why: It’s cheap ($10-$15), it works perfectly in my testing, and you get two (one for the spare key)


    What is a Faraday Bag? (And Why You Need One)

    Before we get to the testing, let’s do a quick recap of what we are actually dealing with here. If you’re like me, you probably didn’t worry about “RF signals” ten years ago. But with modern keyless entry, convenience has created a security hole.

    A Faraday bag (or pouch) is essentially a portable Faraday cage. It’s lined with a metallic mesh—usually a mix of copper, nickel, or silver—that is conductive. When you seal the bag, that mesh creates a shield that blocks electromagnetic fields.

    In plain English? It makes your keys invisible to your car.

    Why people buy them

    Most of us aren’t trying to go off the grid; we just want to protect our stuff.

    • Car Theft Prevention: This is the big one. It stops the relay attacks I mentioned earlier.
    • Credit Card Security: It blocks RFID skimmers from reading your cards in your pocket.
    • Digital Privacy: Some people use larger bags to block phone tracking or remote wiping signals while traveling.

    However, a Faraday bag is binary. It either works, or it doesn’t. There is no “90% blocked.” If a sliver of signal gets out, your car can be stolen. That is why learning how to test a Faraday bag is just as important as buying one.


    The Walk-Up Test: The Gold Standard

    This is the simplest, most reliable test you can do. You don’t need fancy radio frequency meters or an engineering degree. If your car has keyless entry (meaning you can unlock the door just by grabbing the handle while the key is in your pocket), you can do this right now.

    Step 1: Verify Your Car Works Normally

    First, let’s establish a baseline. Walk up to your car with your keys in your hand or pocket, just like you normally would.

    • Grab the handle.
    • Did it unlock?
    • Good. We know the car’s sensors and the key fob battery are working.

    Step 2: Put Keys in the Faraday Bag

    Now, take your key fob and place it inside the Faraday bag.

    • Crucial Step: You must seal it completely.
    • If it’s Velcro, press it down tight. If it’s a magnetic closure, ensure it snaps shut. If it’s a roll-top, roll it tight.
    • The Rule: If air can get in, a signal can get in. Leave no gaps.

    Step 3: Walk Up to Your Car

    With the key sealed inside the bag, approach your driver’s side door.

    • Stand right next to the door—the same spot where it unlocked a moment ago.
    • Hold the bag right next to the handle (much closer than a thief would ever get).
    • Try to open the door. Pull the handle. Press the unlock button on the handle if your car has one.

    Step 4: Interpret the Results

    ✅ The Door STAYS LOCKED Congratulations. The bag works. Your car cannot “see” the key, which means the signal is effectively blocked. You can trust this bag to stop a relay attack from your driveway.

    ❌ The Door UNLOCKS The bag failed. It is effectively useless for security. If the car can sense the key through the bag from two feet away, a thief with a signal amplifier can definitely grab that signal from your front porch. Return it immediately.

    Pro Tips for Accuracy

    • Test at different distances: Start 10 feet away and walk closer. If the car unlocks at 5 feet, the shielding is very weak.
    • Open vs. Closed: Just to prove the point, try opening the flap of the bag while standing there. The car should immediately recognize the key and unlock. This confirms the shielding material was doing the work, not a dead battery.
    • Multiple attempts: I usually test a new bag three times just to be absolutely sure.

    Common Mistakes

    • The “Gap” Error: The most common reason for failure isn’t the mesh; it’s the user not closing the Velcro all the way.
    • Wrong Pocket: Some bags have two pockets—one with shielding and one without (usually for extra storage). Make sure your key is in the metallic/shielded pocket.

    Alternative Tests (If You Don’t Have Keyless Entry)

    Maybe you bought a Faraday bag for your phone, or you don’t have a keyless car to test with. You can still verify the shielding, though these methods are slightly less definitive than the car test.

    The Phone Call Test

    1. Turn your cell phone volume up.
    2. Place your phone inside the Faraday bag and seal it tight.
    3. Wait 10 seconds.
    4. Use a spouse’s phone or a landline to call your number.

    ✅ The Result: If the call goes straight to voicemail, the bag works. The cellular signal was blocked. ❌ The Result: If you hear the phone ringing inside the bag, it failed.

    The Bluetooth Speaker Test

    1. Connect your phone to a Bluetooth speaker and start playing music.
    2. Drop the phone into the bag and seal it.

    ✅ The Result: The music should cut out and stop almost immediately. ❌ The Result: If the music keeps playing, the Bluetooth signal (which is similar to some key fob frequencies) is leaking through.

    A Warning About These Tests

    While helpful, the phone test isn’t perfect. Cellular signals, Wi-Fi, and car key fobs operate on different frequencies. It is rare, but possible, for a bag to block a 4G/5G signal but fail to block the specific RF frequency of a car key. If you are buying the bag specifically for your car, the Walk-Up Test is the only one that truly matters.


    What to Do If Your Bag Fails the Test

    If your door unlocked during the Walk-Up Test, don’t try to convince yourself “it’s probably fine.” It isn’t.

    1. Immediate Action: Return it. Most Amazon sellers have a 30-day return policy. Do not keep a defective security product. Using a leaky Faraday bag is worse than using nothing because it gives you a false sense of security.

    2. Spotting the Fakes: Now that I’ve tested so many, I’ve started to notice red flags on the junk bags:

    • Price: If it costs $6.99 for a two-pack, be skeptical. Good shielding material costs money.
    • Construction: Cheap bags feel thin, like a windbreaker. Good bags feel stiff and substantial because of the multiple layers of mesh.
    • Brand: If the brand name is a random string of capital letters you’ve never heard of, be careful.

    For a deeper dive on what to look for, check out my full guide on [Best Faraday Bags for Key Fobs] where I break down the construction quality of top brands.


    Best Faraday Bags That Pass the Test

    After throwing out the garbage bags that failed, here are the three that actually passed my Walk-Up Test and are worth your money.

    1. Budget Pick: TICONN Faraday Bag

    If you just want something cheap that works, this is the one.

    • Price: ~$12-15 for a 2-pack
    • Passes Walk-Up Test: ✅ YES
    • The Verdict: It’s not the prettiest bag, and the Velcro tends to wear out after about 6 to 9 months of daily use, but right out of the box, it blocks signals perfectly. Great for a spare set of keys.
    • [Check Price on Amazon]

    2. Best Overall: Mission Darkness Key Fob Shield

    This is what I personally use for my daily driver. Mission Darkness supplies forensic equipment to law enforcement, so they aren’t messing around.

    • Price: ~$30
    • Passes Walk-Up Test: ✅ YES
    • The Verdict: It feels like tactical gear. It has a triple layer of shielding fabric. I also like that it doesn’t look like a cheap pouch; it’s durable and holds up to being tossed in my work bag every day.
    • [Check Price on Amazon]

    3. Premium Pick: SLNT (Silent Pocket)

    If you wear a suit to work or just hate the sound of Velcro ripping open, this is the upgrade pick.

    • Price: ~$45
    • Passes Walk-Up Test: ✅ YES
    • The Verdict: It uses a magnetic closure which is silent (hence the name) and self-sealing. It looks professional—like a nice leather wallet—and the signal blocking is top-tier.
    • [Check Price on Amazon]

    Conclusion

    We spend tens of thousands of dollars on our cars, so spending $20 to protect them is a no-brainer. But remember: Don’t trust; verify.

    🛡️ Pro Tip: The “Digital” Faraday Bag

    A physical Faraday bag only protects your phone while it’s inside the bag. As soon as you take it out to use it, your location and data are instantly broadcast to cell towers and trackers.

    To stay invisible while using your phone, security professionals use a No-Logs VPN as a “Digital Layer.”

    We use and recommend Proton VPN for its Swiss jurisdiction and proven no-logs policy.

    PacketMoat Reader Exclusive

    A Faraday bag is only good if it actually blocks the signal. The Walk-Up Test takes 30 seconds. You can do it right now in your driveway. If your door stays locked, you’re good. If it unlocks, you know you have a problem before a thief finds out for you.

    Go test your bag right now. If it fails, send it back and grab one of the proven ones I listed above. It’s a small step that could save you a massive headache.

  • YubiKey Windows Login: The Easy Way to Log Into Windows 11 Without a Password

    YubiKey Windows Login: The Easy Way to Log Into Windows 11 Without a Password

    PacketMoat is reader-supported. When you buy through links on our site, we may earn an affiliate commission at no extra cost to you.

    Picture this: You sit down at your PC, tap a small gold key, and instantly you’re logged in. No typing long, complex passwords. No waiting for authentication apps. Just a simple tap and you’re in.

    This isn’t science fiction this is YubiKey windows login, and you can set it up in about 10 minutes. If you haven’t bought one yet, you’ll need a YubiKey 5 series device (5 NFC, 5C, 5 Nano, or 5C Nano all work perfectly for this setup).

    Why Use a Hardware Key for Login?

    Security: Keyloggers can’t steal a physical tap. Even if malware infects your PC, it can’t capture your “password” because there isn’t one to capture.

    Speed: Tapping a key is significantly faster than typing Tr0ub4dor&3 every single time.

    Cool Factor: Let’s be honest—it just feels incredibly professional and futuristic.

    ⚠️ The “Danger” Warning (Crucial)

    Stop and read this carefully: Before you configure anything, you MUST have a backup plan. If you set this up incorrectly and lose your YubiKey, you could be completely locked out of your own computer.

    The Solution: Create a spare local administrator account with a strong password written down and stored safely, OR register a second backup YubiKey. Don’t skip this step—you’ve been warned!

    Step 1: Step 1: Download the YubiKey Windows Login Tool

    Windows doesn’t handle this natively for local accounts perfectly, so you need the official tool. Head to the Yubico website and download “Yubico Login for Windows”—it’s completely free and officially supported.

    This small application bridges the gap between your YubiKey’s capabilities and Windows’ authentication system.

    Step 2: Configuration

    1. Open the “Yubico Login for Windows” configuration tool
    2. Select your user account from the dropdown
    3. Insert your YubiKey 5 series device
    4. Click “Register”

    Important choice: The tool will ask if you want “Key + Password” (2FA) or just “Key” (passwordless). For maximum convenience, we’re focusing on passwordless login—just the key tap.

    The registration process takes about 30 seconds and creates a unique cryptographic relationship between your specific YubiKey and your Windows account.

    Step 3: The Moment of Truth

    Time for the big test:

    1. Reboot your computer
    2. At the login screen, you won’t see the familiar password box
    3. Instead, you’ll see “Insert YubiKey” or a similar prompt
    4. Insert your YubiKey 5 and tap the gold contact
    5. You’re instantly logged in

    That’s it. No passwords, no waiting, no typing. Just tap and go.

    Troubleshooting Quick Tips

    • Make sure your YubiKey 5 series is properly inserted
    • If it doesn’t work, try removing and reinserting the key
    • The gold contact area needs a firm, deliberate tap
    • Ensure you registered the correct Windows user account

    Conclusion

    Congratulations! You have successfully set up your yubikey windows login. Your computer is now protected by the same technology used by government agencies and Fortune 500 companies.

    Your YubiKey 5 creates an unhackable bridge between you and your digital life. No more forgetting passwords, no more typing complex combinations, and no more vulnerability to remote attacks.

    Now that your PC is locked down tighter than Fort Knox, make sure you’re following other security best practices once you’re inside!

    Remember: Keep that backup plan ready, and enjoy your new superpower of passwordless computing.

  • Stop Browsing as Administrator: The #1 Security Mistake Windows Users Make

    Stop Browsing as Administrator: The #1 Security Mistake Windows Users Make

    PacketMoat is reader-supported. When you buy through links on our site, we may earn an affiliate commission at no extra cost to you.

    Last month, I walked out of Microcenter with a shiny new PC, excited to set up my fresh Windows installation. Like many users, I made the mistake of browsing as administrator right out of the box.. For the first six hours, I was in digital heaven – no more annoying User Account Control (UAC) prompts interrupting my workflow, no password requests when installing software, and seamless system modifications.

    Then a cybersecurity professional friend dropped by and immediately spotted my rookie mistake. “You’re browsing the internet with admin credentials?” he asked, visibly concerned. “You know better than that.” His words hit me like a cold splash of reality, and I quickly realized I had fallen into one of the most dangerous traps in Windows security.

    Understanding the UAC: Your First Line of Defense

    If you’ve never encountered the User Account Control (UAC) prompt – that pop-up window requesting administrator permissions when installing software or making system changes – you’re likely making the same mistake I was. UAC serves as a critical security barrier, forcing you to consciously approve potentially dangerous actions before they execute.

    When you operate under an Administrator account full-time, UAC either doesn’t appear or automatically grants permissions without your explicit consent. This seemingly convenient setup creates a massive security vulnerability that cybercriminals actively exploit.

    This is the hidden danger of browsing as administrator—the UAC doesn’t warn you when it should.

    Why Browsing as Administrator is a Gift to Hackers

    Cybercriminals understand human nature: we gravitate toward convenience, often at the expense of security. When you run Windows with administrative privileges for everyday tasks, you’re essentially giving hackers a golden ticket to your entire system.

    Here’s the terrifying reality: all it takes is one malicious email attachment, one infected download from a questionable source, or one unpatched vulnerability for attackers to completely compromise your machine. When malware executes under Administrator privileges, it gains unrestricted access to:

    • System files and registry entries
    • Other user accounts and their data
    • Network resources and shared drives
    • Installed software and security applications
    • Sensitive documents and personal information

    How Administrator-Level Attacks Devastate Your PC

    When hackers successfully exploit a system running under Administrator credentials, the damage can be catastrophic. Malware operating with admin privileges can:

    Install Persistent Backdoors: Attackers can embed deep-level access tools that survive system restarts and security scans, maintaining long-term control over your computer.

    Disable Security Software: Administrative access allows malware to turn off antivirus programs, firewalls, and Windows Defender, leaving your system completely exposed.

    Access Encrypted Data: Admin-level malware can potentially bypass file encryption and access supposedly secure documents.

    Spread Across Networks: If your compromised admin account connects to business networks or shared resources, the infection can spread to other systems.

    Creating a Standard User Account: Your Security Lifeline

    Protecting your system requires creating and using a standard user account for daily activities. Here’s how to set this up properly:

    1. Open Settings: Press Windows + I and navigate to “Accounts” > “Family & other users”
    2. Add Account: Click “Add someone else to this PC”
    3. Create Local Account: Select “I don’t have this person’s sign-in information,” then “Add a user without a Microsoft account”
    4. Configure Details: Enter username and password for your new standard account
    5. Set Account Type: Ensure the account type remains “Standard User” (not Administrator)

    Once created, log out of your Administrator account and sign in with your new standard user profile for all everyday activities. Keep the Administrator account strictly for system maintenance, software installations, and troubleshooting.

    Conclusion: Security Over Convenience

    While browsing as administrator feels convenient, the security risks far outweigh the benefits., the security risks far outweigh the benefits. By creating and using a standard user account, you maintain that crucial UAC protection barrier while significantly reducing your attack surface. Remember: in cybersecurity, a few extra password prompts can save you from devastating data breaches, identity theft, and complete system compromise.

    Now that you have separated your accounts, you need to lock that Admin account down tight. Read my [YubiKey 5 NFC Review] to see how to secure it with a hardware key.

    Your future self will thank you for choosing security over convenience.

  • How to Easily Find Hidden Cameras in your Airbnb (2026 Guide)

    How to Easily Find Hidden Cameras in your Airbnb (2026 Guide)

    PacketMoat is reader-supported. When you buy through links on our site, we may earn an affiliate commission at no extra cost to you.

    Learning how to find hidden cameras is the most important skill for any traveler in 2026. Whether you need to check for cameras in Airbnb properties, spot hidden cameras in hotel rooms, or scan rental homes for spy devices, this guide covers the exact methods security professional’s use. Look, I get it. You just survived a 6-hour flight, your back hurts, and the last thing you want to do is sweep your rental for spy cameras. But here’s the thing—I work in cybersecurity. I spend my days defending networks from people who exploit trust for a living. And I can tell you that “it won’t happen to me” is exactly what bad actors are counting on.

    Hidden cameras in vacation rentals aren’t some urban legend. They’re a real problem, and it’s gotten worse. We’re talking tiny lenses stuffed inside smoke detectors, alarm clocks, even those random USB chargers that are just… there when you check in. Most of them? You’d walk right past them.

    I do a 5-minute security sweep every single time I check into an Airbnb or hotel. It’s become habit at this point. In this guide, I’ll walk you through exactly what I do—the manual checks, the phone apps, and the one category of gadget that catches what your eyes can’t.


    Short on Time? Here’s What I’d Buy

    If you just want the quick answer, these are the detectors actually worth your money in 2026:

    The heavy hitters:

    • JMDHKK Hidden Camera Detector – The one most people should get. Does RF, GPS trackers, and lens detection. It just works.
    • C10 Pro Professional Bug Detector – Overkill for most people, but if you travel for business or you’re paranoid (no judgment), this thing has an AI chip and catches stuff in the 1MHz to 10GHz range. Comes with a lifetime warranty too.

    If you’re on a budget:

    • JAXTIN G9 Pro – 72-hour battery life. Seriously. Great for longer trips.
    • Aleanu Hidden Camera Detector – Picks up cellular signals too, which matters because some newer spy devices skip Wi-Fi entirely.

    Alright, let’s get into the actual process.

    How to Check for Hidden Cameras in Airbnb Rentals


    Step 1: The Old-School Physical Sweep

    No gadgets needed here. Just your phone’s flashlight and a few minutes.

    Turn off all the lights and close the curtains. Camera lenses have this reflective coating that catches light in a very specific way—you’ll see a tiny glint if you know what to look for.

    Grab your phone, turn on the flashlight, and slowly scan these spots:

    Smoke detectors. This is where I always start. It’s the #1 hiding spot because nobody ever looks up. Check for any detector that looks slightly different from the others in the unit, or has a small dark hole that doesn’t seem to do anything. Also pay attention to placement—if it’s angled weirdly toward the bed, that’s a red flag.

    Random USB chargers. If there’s a charger already plugged into the wall and you didn’t put it there, take a closer look. Spy chargers are like $20 on Amazon and they look completely normal.

    Alarm clocks. Specifically the speaker grills. Shine your light through the mesh and see if anything’s hiding behind the display.

    AC vents. Cameras love a high angle. Vents give them exactly that.

    This quick visual check to find hidden cameras takes two minutes and catches the obvious stuff.

    Step 2: Scan the Wi-Fi Network

    Here’s where it gets interesting. A lot of these cameras connect to the host’s Wi-Fi so they can stream footage remotely. That’s convenient for them—and it’s a vulnerability you can exploit.

    Download an app called Fing. It’s free, works on iPhone and Android, and it’ll show you every device connected to the network. For additional digital privacy while traveling, consider using a VPN on public networks.

    Connect to the Airbnb’s Wi-Fi and run a device scan. You’re looking for anything labeled “IP Camera,” “Nest,” “Arlo,” or manufacturer names like “Shenzhen” or “Hikvision.” If you see a device that’s just a MAC address with no name and the host can’t tell you what it is? Unplug that router and call Airbnb.

    Not foolproof, but it catches the lazy setups.


    Step 3: The RF Detector Sweep

    Okay, here’s the problem with the network scan: the really sketchy cameras don’t use Wi-Fi at all. They just record to an SD card locally. No signal, no network footprint, nothing for Fing to find.

    To catch these, you need something that detects radio frequencies or the magnetic signature of a camera lens. This is where a dedicated detector comes in.

    I keep one in my travel bag to find hidden cameras whenever I travel.

    Best Tools to Find Hidden Cameras in Airbnb


    The Detectors I Actually Recommend

    JMDHKK Hidden Camera Detector

    This is the one I tell most people to get. JMDHKK has been in this space for a while, and their detector handles the three things you actually need: RF detection for wireless cameras, magnetic field detection for GPS trackers, and a lens finder for the hardwired stuff.

    It’s not fancy. It doesn’t have an app or Bluetooth connectivity or whatever. It just does the job, and it does it consistently. Good for hotels, Airbnbs, even checking your own car if you’re worried about trackers.


    C10 Pro Professional Bug Detector

    This one’s for the people who want the best and don’t mind paying for it. The C10 Pro has an AI-powered detection chip (yeah, really) and scans from 1MHz all the way up to 10GHz. That’s a wider range than most detectors on the market.

    What I actually like about it: you get three detection modes. There’s a visual mode with lights, a vibration-only mode for when you need to be discreet, and a mixed mode. The 9-level signal meter helps you pinpoint exactly where something is hiding instead of just “somewhere in this general direction.”

    Oh, and it comes with a lifetime manufacturer warranty. That’s rare.


    Good Detectors That Won’t Break the Bank

    You don’t need expensive gear to find hidden cameras effectively.

    Not everyone needs the top-tier stuff. These mid-range options still get the job done.

    JAXTIN G9 Pro

    The killer feature here is the battery. 72 hours of working time. If you’re doing a two-week trip through Europe and don’t want to think about charging yet another device, this is the one.

    Six sensitivity levels let you dial it in based on how many electronics are in the room (hotels with a dozen gadgets need different settings than a bare-bones cabin).


    Aleanu Hidden Camera Detector

    The Aleanu’s claim to fame is frequency range—it goes from 1MHz to 6.5GHz, which covers 2G, 3G, and 4G cellular signals. Why does that matter? Because some of the newer spy devices transmit over cellular instead of Wi-Fi specifically to avoid network scans.

    Six sensitivity levels, straightforward to use. Nothing flashy, just solid coverage.


    Quick Buyer’s Guide

    If you’re comparison shopping, here’s what actually matters:

    Frequency range – At minimum, you want 1MHz to 6.5GHz. Wider is better.

    Infrared scanning – This catches cameras that aren’t transmitting anything. Non-negotiable feature.

    Magnetic detection – For GPS trackers. Important if you’re renting cars too.

    Sensitivity levels – More levels = more control. Look for at least 5 or 6.

    Battery life – Matters more than you’d think on longer trips.

    Size – If it’s annoying to pack, you won’t bring it.

    Most decent options run between $15 and $50. You don’t need to spend more than that unless you’re doing this professionally.

    How to Spot Cameras in Airbnb: Step-by-Step


    How to Actually Use These Things

    Turn the sensitivity up. Walk slowly. That’s basically it.

    Start near the bed and bathroom—the places someone would actually want footage of. If the detector starts beeping or lighting up near a smoke detector, a shelf, or any object that has no business emitting a signal, stop and investigate.

    The signal strength meter (if your detector has one) helps you narrow it down. Move closer, watch the levels climb, find the source.


    Final Thoughts

    I wish I didn’t have to write guides like this. Most hosts are normal people just trying to make some extra income. But it only takes one creep to make you feel unsafe in a place you’re paying to sleep in.

    The physical sweep catches the obvious stuff. The physical sweep helps you find hidden cameras that are poorly concealed and a decent RF detector catches everything else.

    Takes five minutes. Costs less than a checked bag fee. For complete travel security, also check out our guide on Faraday bags for protecting your devices from tracking.

    Stay safe out there.