How to Set Up a Home Network Firewall Step by Step (2026 Guide)
What You’ll Learn and Why It Matters
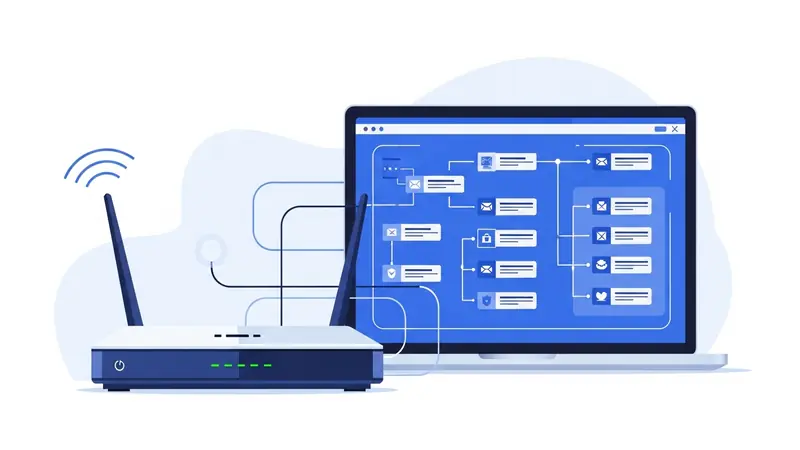
Setting up a home network firewall is one of the most effective ways to protect all your devices from external threats. Unlike antivirus software that runs on individual computers, a network firewall sits between your home network and the internet, blocking malicious traffic before it reaches any device.
This article contains affiliate links. PacketMoat may earn a commission at no extra cost to you when you purchase through these links. This helps support our cybersecurity research and content creation.
This guide walks you through how to set up a home network firewall step by step, covering both router-based firewalls (which most people already have) and dedicated hardware firewall solutions. You’ll learn to configure rules, test your protection, and avoid common mistakes that leave networks vulnerable.
By the end, you’ll have a properly configured firewall protecting every device on your network—computers, phones, smart home devices, and IoT gadgets that often lack their own security measures.
Prerequisites: What You Need Before Starting
Before you begin configuring your home network firewall, gather these essentials:
- Router admin access: You need the username and password to log into your router’s configuration interface (usually printed on a sticker on the router itself)
- A computer connected to your network: Wired ethernet connection is best for configuration to avoid being locked out
- Your router’s IP address: Typically 192.168.1.1 or 192.168.0.1 (check your router documentation)
- 30-45 minutes of uninterrupted time: You’ll need to test changes and may temporarily lose internet access during configuration
If you’re setting up a dedicated hardware firewall, you’ll also need the firewall device itself and an additional ethernet cable. Popular options include the Firewalla Gold for home users or enterprise-grade options like Ubiquiti’s UniFi Security Gateway.
Step 1: Access Your Router’s Firewall Settings

Your router almost certainly has a built-in firewall—it’s just a matter of accessing and configuring it properly. Open a web browser and type your router’s IP address into the address bar. For most routers, this is 192.168.1.1, 192.168.0.1, or 192.168.2.1.
Enter your admin credentials when prompted. If you’ve never changed these, check the sticker on your router or search for your router model’s default login online. Critical first step: Change the default admin password immediately—default credentials are publicly known and represent a massive security vulnerability.
Once logged in, look for sections labeled “Firewall,” “Security,” “Advanced Settings,” or “WAN Settings.” The exact location varies by manufacturer (Netgear, TP-Link, Asus, etc.), but firewall controls are typically under security or advanced menus.
Step 2: Enable Basic Firewall Protection
Most modern routers have their firewall enabled by default, but verify this setting. Look for an option to “Enable SPI Firewall” or “Enable Firewall Protection.” SPI (Stateful Packet Inspection) is the standard firewall technology that tracks connection states and blocks unsolicited incoming traffic.
Enable these essential firewall features if available:
- Block WAN requests: Prevents external devices from pinging or detecting your router
- DoS protection: Defends against denial-of-service attacks that flood your network
- Port scan detection: Alerts you when someone is probing your network for vulnerabilities
- IP flood detection: Blocks suspicious traffic patterns that indicate attacks
These settings provide baseline protection against common internet threats. Apply the changes and wait for your router to restart if required.
Step 3: Configure Inbound and Outbound Rules
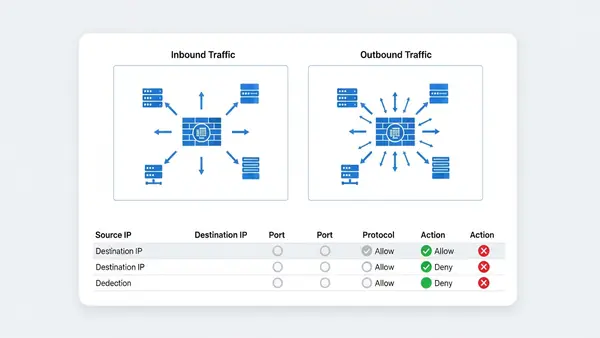
This is where you define what traffic can enter and leave your network. The principle of least privilege applies: block everything by default, then allow only what you need.
Inbound rules control traffic coming from the internet to your devices. For most home networks, you should block ALL inbound connections unless you’re running a server or need remote access. Your firewall’s default “deny all inbound” stance is correct—don’t change it unless you have a specific reason.
Outbound rules control traffic leaving your network. Most home routers allow all outbound traffic by default, which works for typical usage. However, if you want maximum security, you can create rules to block suspicious outbound connections or restrict specific devices (like IoT cameras) from accessing the internet entirely.
To create a custom rule, you’ll typically specify: protocol (TCP/UDP), port number, source IP (device on your network), and destination (internet address or range). Start conservatively—overly restrictive rules will break legitimate services.
Step 4: Set Up Port Forwarding Carefully (If Needed)
Port forwarding creates exceptions in your firewall to allow specific external traffic to reach devices on your network. Common uses include gaming consoles, security cameras, or remote desktop access. However, each forwarded port is a potential vulnerability.
If you must forward ports, follow these security practices:
- Forward only the minimum required ports: Don’t open port ranges unless absolutely necessary
- Use non-standard ports when possible: Change default ports (like 22 for SSH) to reduce automated attacks
- Implement IP whitelisting: Restrict access to specific external IP addresses if you know where connections will originate
- Enable logging: Monitor forwarded ports for suspicious access attempts
Better alternatives exist for most port forwarding scenarios. VPNs provide secure remote access without exposing ports. Cloud-based services eliminate the need for direct home network access. Consider these options before opening your firewall.
Step 5: Enable DMZ for Isolated Devices (Advanced)
A DMZ (Demilitarized Zone) is a separate network segment for devices that need internet exposure but shouldn’t have access to your main network. This is advanced configuration, but valuable if you run servers or have IoT devices you don’t fully trust.
Many consumer routers offer a simplified “DMZ host” feature that places one device outside the firewall. This is actually less secure than true DMZ segmentation—it exposes that device completely. If your router supports VLANs (Virtual LANs), use those to create proper network isolation instead.
For true DMZ capability, consider upgrading to a business-class router or dedicated firewall that supports multiple network interfaces and sophisticated routing rules.
Step 6: Configure Device-Specific Firewall Rules
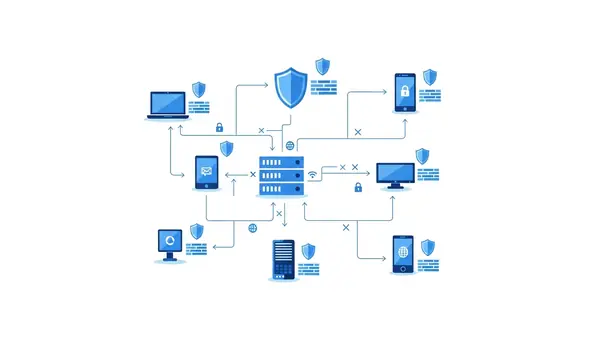
Modern threats often target the weakest link in your network—usually IoT devices with poor security. Your firewall can restrict what each device can do, even if the device itself has no security features.
Create rules based on device MAC addresses to:
- Block IoT devices from internet access: Smart home devices often work fine on your local network without internet connectivity
- Restrict smart TVs: Prevent data collection by blocking their connections to analytics servers while allowing streaming services
- Isolate guest devices: Use guest network features with firewall rules that prevent access to your main network resources
- Limit children’s devices: Control when and where kids’ devices can connect
This granular control turns your firewall into a powerful network management tool beyond just security. The Stop Browsing as Administrator: The #1 Security Mistake Windows Users Make principle applies to networks too—devices should have minimum necessary access.
Step 7: Install Dedicated Firewall Hardware (Optional but Recommended)
Consumer router firewalls provide basic protection, but dedicated firewall hardware offers significantly more capability. If you work from home, run a small business, or have high security requirements, this upgrade is worthwhile.
Dedicated firewalls provide:
- Deep packet inspection: Examines the content of network traffic, not just headers
- Intrusion detection/prevention (IDS/IPS): Identifies and blocks attack patterns in real-time
- Application-level filtering: Controls specific apps and services, not just ports
- Advanced logging and reporting: Detailed visibility into network activity
- VPN server capability: Secure remote access to your home network
The Firewalla Gold is popular for home users who want enterprise-grade protection without complexity. It sits between your modem and router, inspecting all traffic in both directions. Setup takes about 20 minutes using their mobile app.
For technically advanced users, pfSense or OPNsense running on dedicated hardware provides maximum control and capability. These open-source firewall platforms rival commercial enterprise solutions but require networking knowledge to configure properly.
Step 8: Configure Firewall Logging and Monitoring
A firewall that doesn’t log is like a security camera that doesn’t record—you won’t know about threats until damage is done. Enable logging for blocked connections, security events, and configuration changes.
Most router firewalls offer basic logging in the admin interface. Review logs weekly to identify:
- Repeated block attempts: Someone may be targeting your network
- Unusual outbound connections: Could indicate compromised devices
- Failed login attempts: Attacks on your router’s admin interface
- Port scan activity: Automated tools probing for vulnerabilities
Dedicated firewalls offer sophisticated monitoring with real-time alerts and historical analysis. Set up email or mobile notifications for critical security events so you can respond quickly to threats.
Common Mistakes to Avoid
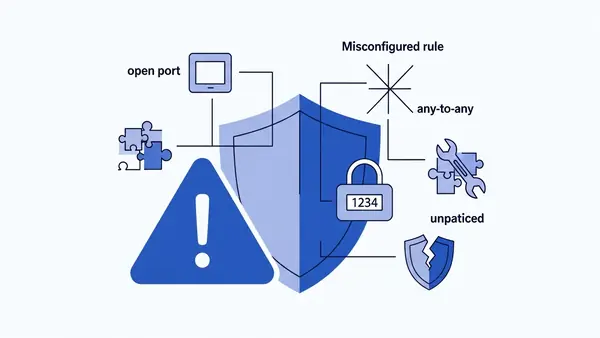
Mistake #1: Using default admin credentials. This is the most dangerous oversight. Attackers have databases of default router passwords and actively scan for vulnerable devices. Change your router’s admin password to something unique and strong—consider using a Best Password Managers for Remote Teams (2026 Review) to generate and store it.
Mistake #2: Disabling the firewall to troubleshoot connectivity issues. When something doesn’t work, people often disable the firewall “temporarily” and forget to re-enable it. Instead, create specific rules to allow the traffic you need while maintaining protection.
Mistake #3: Forwarding ports without understanding the risk. Every open port is an attack surface. Many devices that request port forwarding actually work fine with UPnP (Universal Plug and Play) or don’t need direct access at all. Research alternatives before opening your firewall.
Mistake #4: Ignoring firmware updates. Router manufacturers regularly patch security vulnerabilities in firewall software. Enable automatic updates if available, or check monthly for new firmware. An outdated firewall can be bypassed by known exploits.
Mistake #5: Trusting devices on your network implicitly. Your firewall protects against external threats, but compromised internal devices can attack other devices on your network. This is why network segmentation and device-specific rules matter—assume any device could be compromised.
Verify Your Firewall is Working Properly
Configuration means nothing without verification. Test your firewall to confirm it’s actually protecting your network.
Test 1: Port scan from outside your network. Use ShieldsUP! (grc.com/shieldsup) or similar online port scanning tools to probe your external IP address. All ports should show as “stealth” (not responding) or “closed.” Any “open” ports are potential vulnerabilities unless you specifically forwarded them.
Test 2: Check for IP leaks. Visit whatismyipaddress.com and verify it shows your ISP-assigned IP address, not your internal network address. If internal IPs are visible, your router’s NAT (Network Address Translation) isn’t working correctly.
Test 3: Verify inbound blocking. Try to access your router’s admin interface from a device outside your network (using cellular data, not your home WiFi). You should not be able to reach the login page. If you can, remote administration is enabled—disable it unless absolutely necessary.
Test 4: Confirm device isolation. If you configured device-specific rules, verify they work. For example, if you blocked an IoT camera from internet access, confirm it can’t reach external sites while still functioning on your local network.
Run these tests after initial setup and again whenever you make configuration changes. Regular verification ensures your firewall remains effective as your network evolves.
Next Steps: Additional Network Security Improvements
A properly configured firewall is foundational security, but not sufficient by itself. Layer additional protections to create defense in depth.
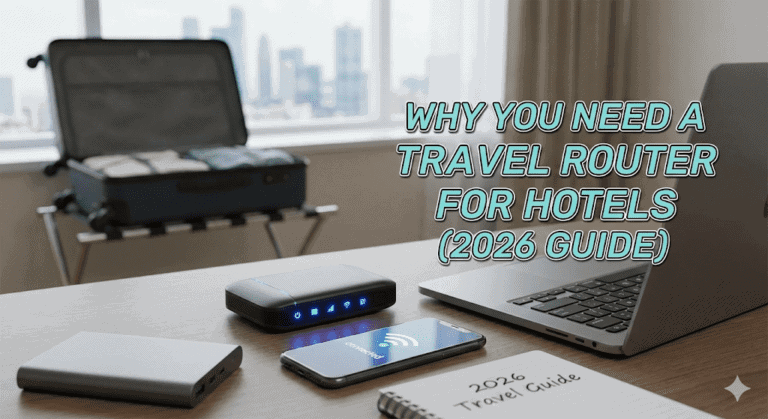
Implement network segmentation. Use VLANs or separate WiFi networks to isolate device types. Keep IoT devices on a separate network from computers and phones. This limits the damage if any single device is compromised. The Why You Need a Travel Router for Hotels (2026 Guide) concept applies at home too—create isolated networks for untrusted devices.
Set up a VPN for remote access. Instead of port forwarding for remote access, configure a VPN server on your router or firewall. This provides encrypted, authenticated access to your home network without exposing services directly to the internet. Many modern routers include OpenVPN or WireGuard server capability.
Enable DNS filtering. Configure your router to use DNS services that block malicious domains (like Cloudflare’s 1.1.1.2 or Quad9). This adds another layer of protection by preventing devices from even reaching known malicious sites, regardless of firewall rules.
Deploy endpoint protection. Your firewall protects the network perimeter, but devices still need their own security. Ensure every computer has updated antivirus software and enable built-in firewalls on individual devices as a second layer of defense.
Secure your physical network. Firewall configuration is meaningless if someone can physically plug into your network. Disable unused ethernet ports on your router, secure your router in a locked location if possible, and implement MAC address filtering on WiFi networks as an additional barrier.
Network security is not a one-time setup—it requires ongoing maintenance. Review your firewall rules quarterly, update firmware promptly, and monitor logs for suspicious activity. The effort investment in learning how to set up a home network firewall step by step pays dividends in long-term protection for all your connected devices.
Tye runs PacketMoat. He's a CISSP-certified cybersecurity professional with 25+ years in IT and 12+ in security, including three real-world breach responses at Netskope and CrowdStrike. He also has a 16-year-old — which is why every parental control on this site gets handed to a real teenager to try to bypass before it's recommended.